Knowledge Base Articles
- BobCAD-CAM V36
- Getting Setup
- Quick Tips & Tricks
- The BobCAD Basics
- Advanced Topics
- Computer Issues
- NC Editor
- Post Processor
- Our Forum
Understanding Cutting Extents
This document describes the differences between the cutting extents for the 3 axis pro toolpaths. The Cutting Extents options change where the boundary is created to determine how the toolpath is calculated on the model (where the tool cuts at the boundary).
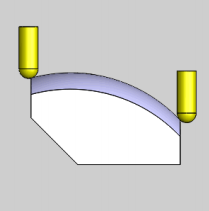
Pic. 1 - Toolpath When Using the “Extents” Cutting Extents
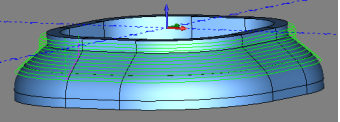
The extents will stay within the bounds of the surface in the X,Y directions. The outer boundary of the part is automatically calculated. The calculated toolpath is then contained inside the outer boundary using the tool tip as the calculation point.
You will want to use either 3D extents or part bottom if you want to machine further down the geometry.
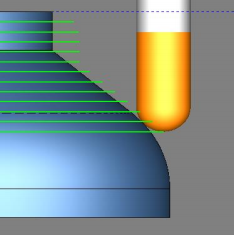
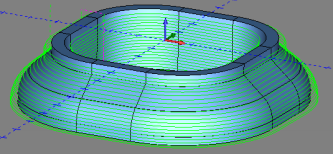
Pic. 2 - Extents Example in the Feature
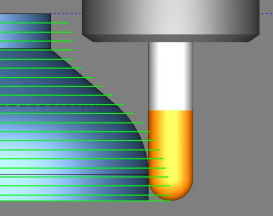
Pic. 3 - Toolpath When Using the “3D Extents” Cutting Extents

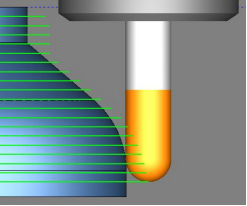
The 3D Extents will extend the boundary to create toolpath further down the surface. This will help get the edges of the model. The outer boundary of the model includes the bottom edge of the selected surfaces at the outermost extremities.
This one is a great option if you just want the toolpath to create toolpath down the surface to include the edges of the surface as well.
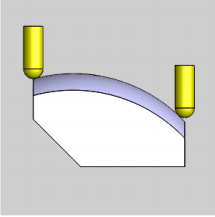
Pic. 4 - 3D Extents Example in the Feature
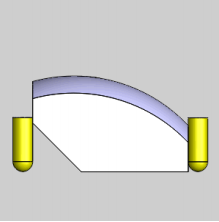
Pic. 5 - Toolpath When Using the “Part Bottom” Cutting Extents
Part bottom will create toolpath all the way down to the bottom of the part. The outer boundary of the model is calculated from the lowest Z-axis value. The toolpath is calculated to include this area.
However, if you wanted the toolpath to go down past the corners of the model, but do not want to go all the way down the part. You can use “Bottom of Job” located on the Parameters page in the feature. You can customize this value to adjust how far you want to toolpath to go down the part.
Pic. 6 - Part Bottom Example in the Feature
If you need further assistance, please contact our support team at (727) 489 – 0003 or [email protected]