Knowledge Base Articles
- BobCAD-CAM V36
- Getting Setup
- Quick Tips & Tricks
- The BobCAD Basics
- Advanced Topics
- Computer Issues
- NC Editor
- Post Processor
- Our Forum
Edit Default Controller in NC Editor for NC File with No M06
If you are having difficulties with NC Editor not showing the tools graphically in the simulation, one reason for this is because your G-Code does not have any M06 tool change call outs in the NC file. Our default controllers inside of the NC Editor outputs the tools by searching for a M06. When a M06 is present, the tool change execution takes effect when running a simulation and NC Editor will grab the tool information for the tool number being output. This document will explain how to modify the controller, so that you do not need the M06 in your NC file to call out the tool. Instead, the tool number by itself, will trigger the tool change execution in the simulation.
Step-by-Step
1. Open the controller you were using in NC Editor in a Notepad ++ (Make sure that you run Notepad ++ in as an Administer.) Open it from the folder below: C:\Program Files\NCEditor V1\Controllers
2. Go to the very top of the controller file and where it says “Name” in the file header (see pic. Below), change it to a different name. This is the name that will show up in the NC Editor simulation when selecting your controller.

3. Click “Save As” and save out the .ccxml file as a different name. (IMPORTANT NOTE: Make sure you change this line first and save the file before changing anything else.)
4. Press CTRL + F to pull up the search window. Type in “Tool Change” and hit the next arrow to get here (see pic below):
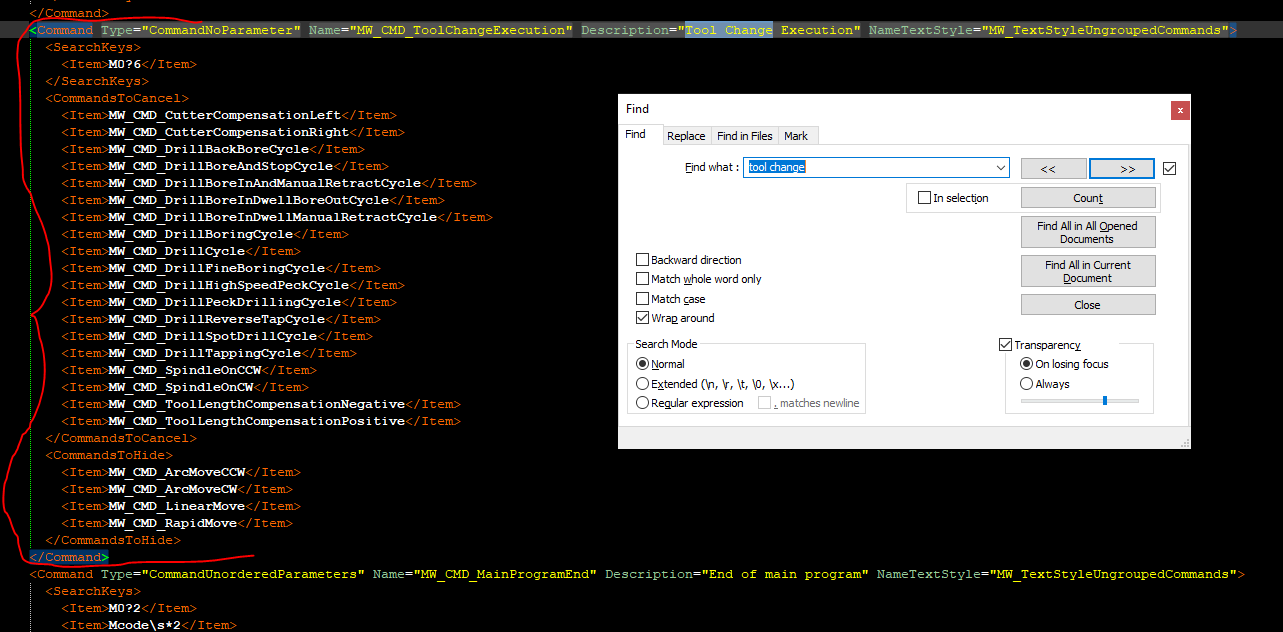
5. Delete the whole command block for the tool change execution (highlighted in the picture above)
6. Insert the code below in place of the existing tool execution:
<Command Type="CommandValue" Name="MW_CMD_ToolChangeExecuteWithNumber" Description="Reads in the ID of the tool and executes the toolchange" NameRule="Tool_Call" NameTextStyle="T" />

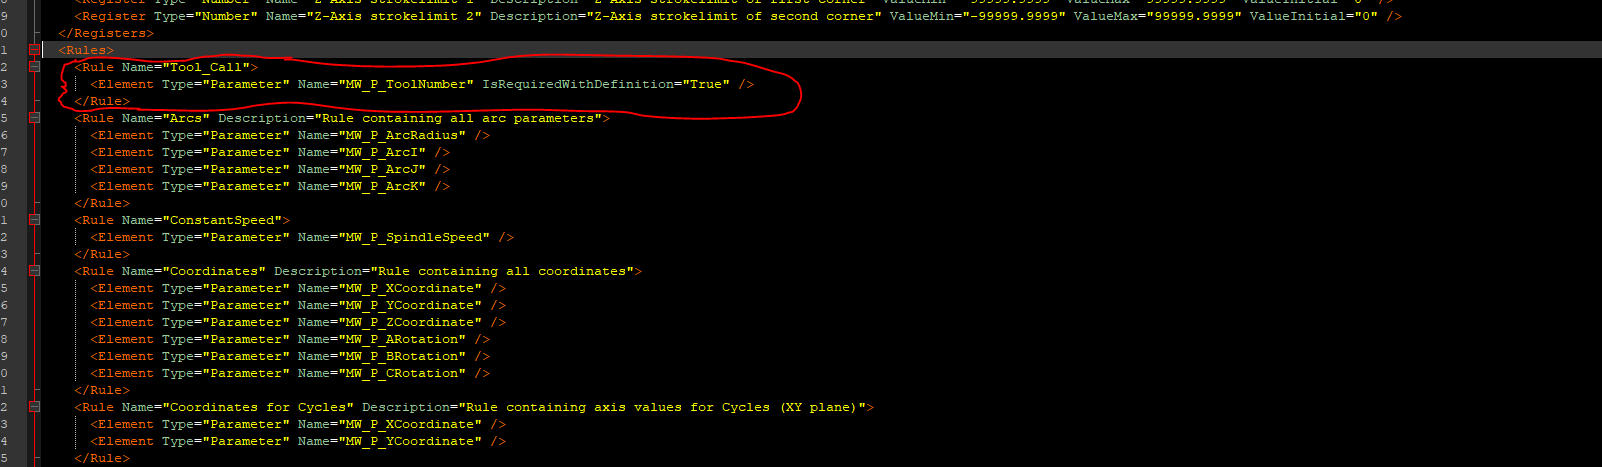
7. Next, go to the “Rules” section (Press CTRL+F and search “Rules”) and insert the following rule code below:
<Rule Name="Tool_Call">
<Element Type="Parameter" Name="MW_P_ToolNumber" IsRequiredWithDefinition="True" />
</Rule>
8. Save the file again. (Note: If you already have NC Editor opened, close it down first and reopen it.)
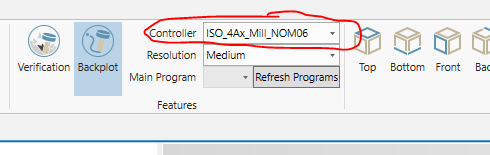
9. You should now be able to see the controller that you have created in the drop-down box under the “Simulation” tab. Select it.
10. Test it out. If it works, in NC Editor, go to File/Options/Controller and select your new controller that you have made and press “OK’. This will make the new controller your default controller inside of NC Editor.
If you need further assistance, please contact our support team at (727) 489 – 0003 or [email protected]