Knowledge Base Articles
- BobCAD-CAM V36
- Getting Setup
- Quick Tips & Tricks
- The BobCAD Basics
- Advanced Topics
- Computer Issues
- NC Editor
- Post Processor
- Our Forum
Toolpath on Wrong Side of Geometry:
Reverse Chain Direction or System Compensation
This document goes over how to adjust the cutting direction and cutting side of the geometry for a Profile Rough, Profile Finish or Chamfer Mill Operation.
The Issue:
A common issue that people run into is the toolpath getting calculated on the opposite side of the geometry than originally desired. This is a result of two things;: the chain direction and the system compensation. These two elements together are what decide the side that the toolpath gets generated on. If you notice that your toolpath gets generated on the wrong side of the profile you select, follow the steps below.
Example: A Square Profile
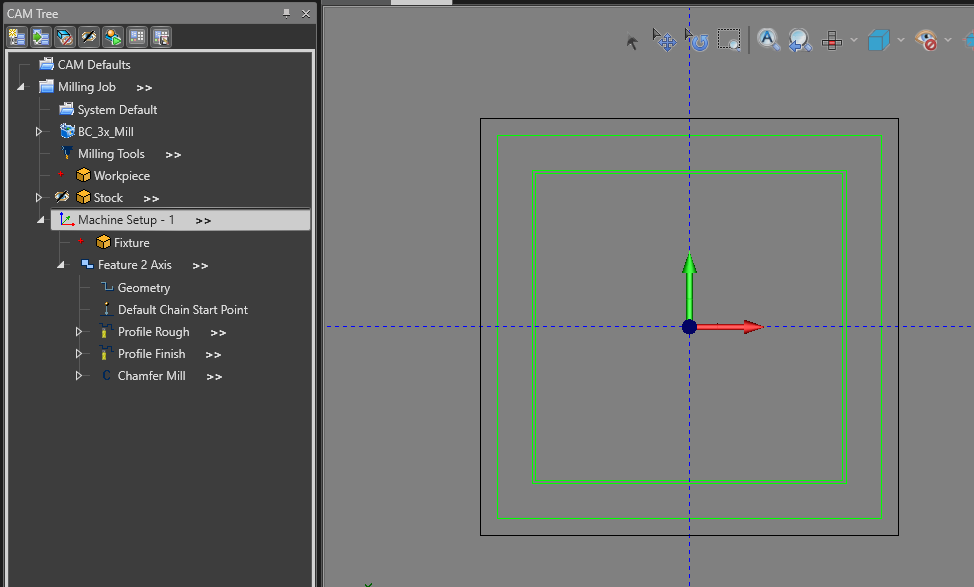
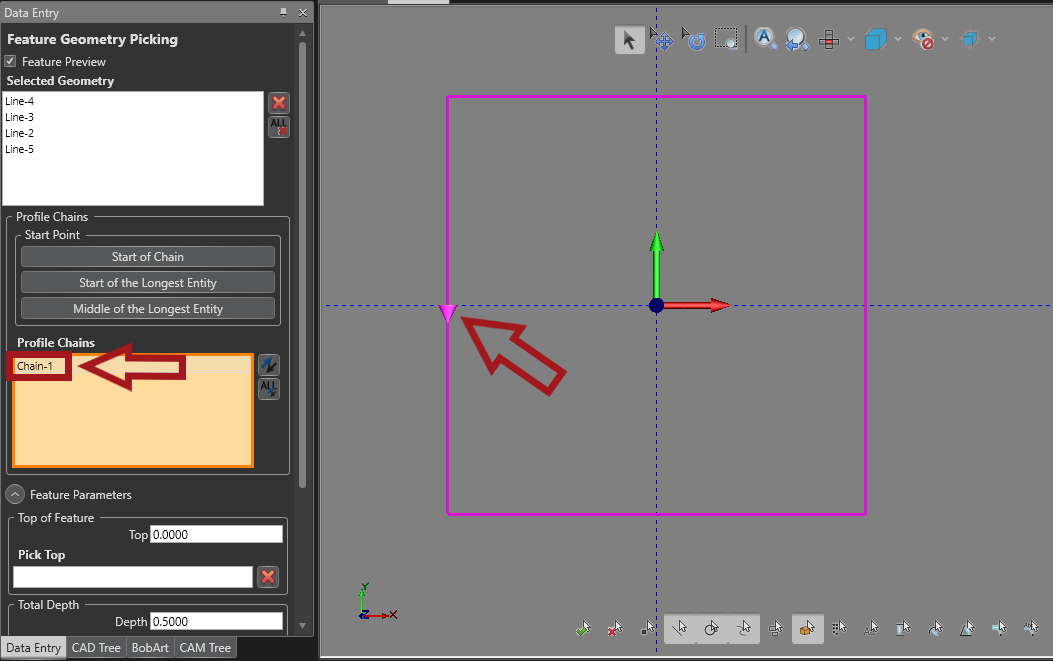
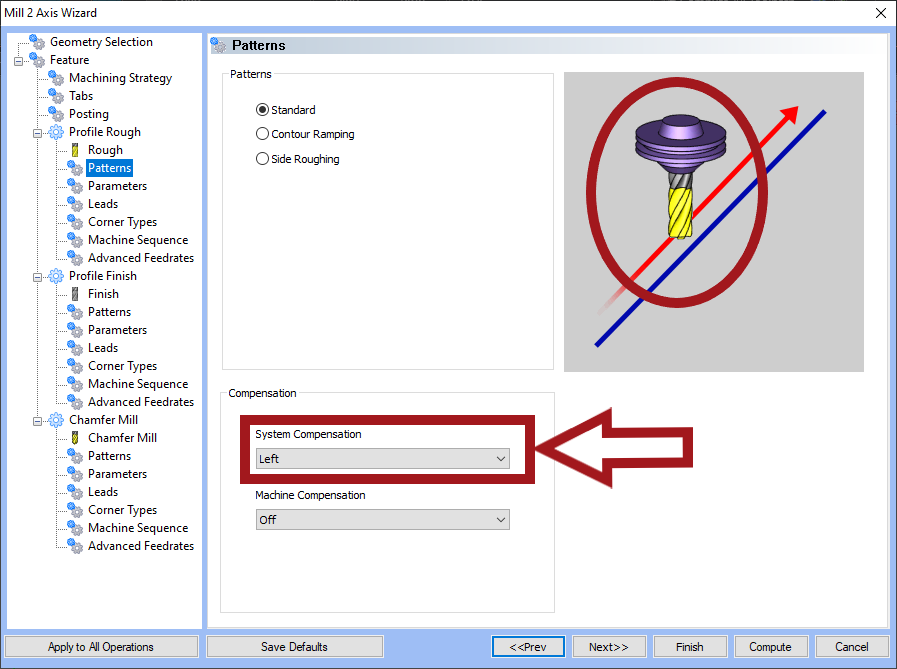
Let's take a square profile for example. In this example, we want to create a profile toolpath on the outside of this square geometry. Pic. 1, 2 & 3 show the Current toolpath, Chain Direction and System Compensation set for this Feature. The Feature contains a Profile Rough, Profile Finish and Chamfer Mill Operation. The Chain Direction is set to a CCW direction (See Pic. 2) and the System Compensation is set to Left (See pic. 3).
Pic. 1 – System Comp LEFT + Chain Direction CCW Toolpath
Pic. 2 – Chain Direction for Selected Geometry
Pic. 3 – System Compensation (Left) on the Patterns Page
There are two different ways to adjust the toolpath so that it is on the outside profile of the geometry.
The Solution:
Step-by-Step
Option 1: Reverse the Direction of the Chain
If you want the tool to move in a clockwise direction. You will simply reverse the chain direction to get the toolpath on the outside of the rectangle.
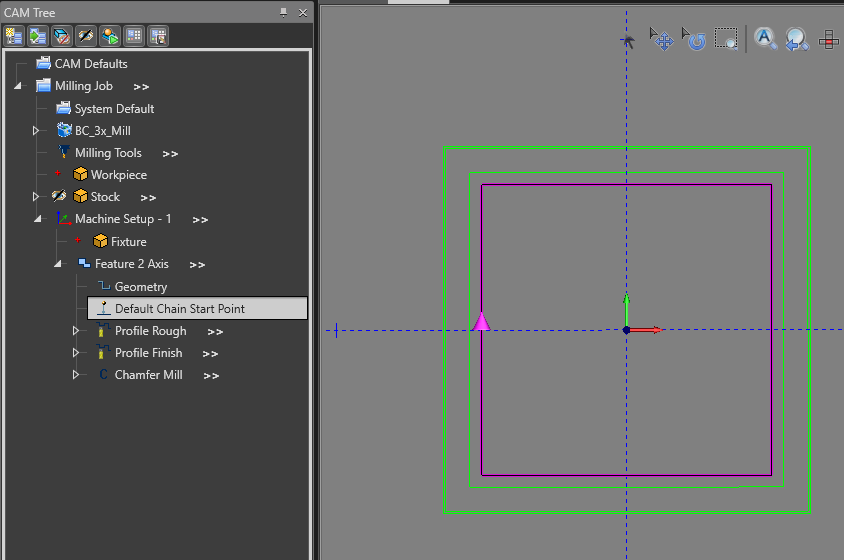
Pic. 6 – Reverse Direction of Chain
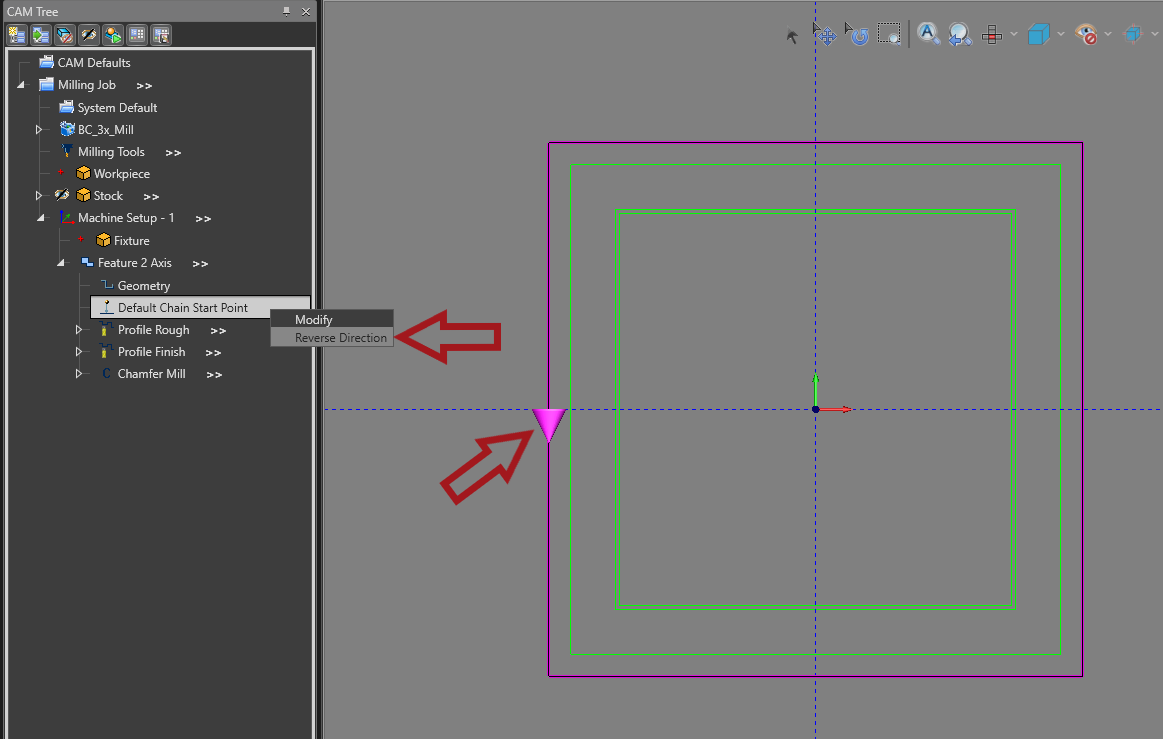
14.1. Right click on Default Chain Start Point and select Reverse Direction
Pic. 7 – Recompute the Toolpath
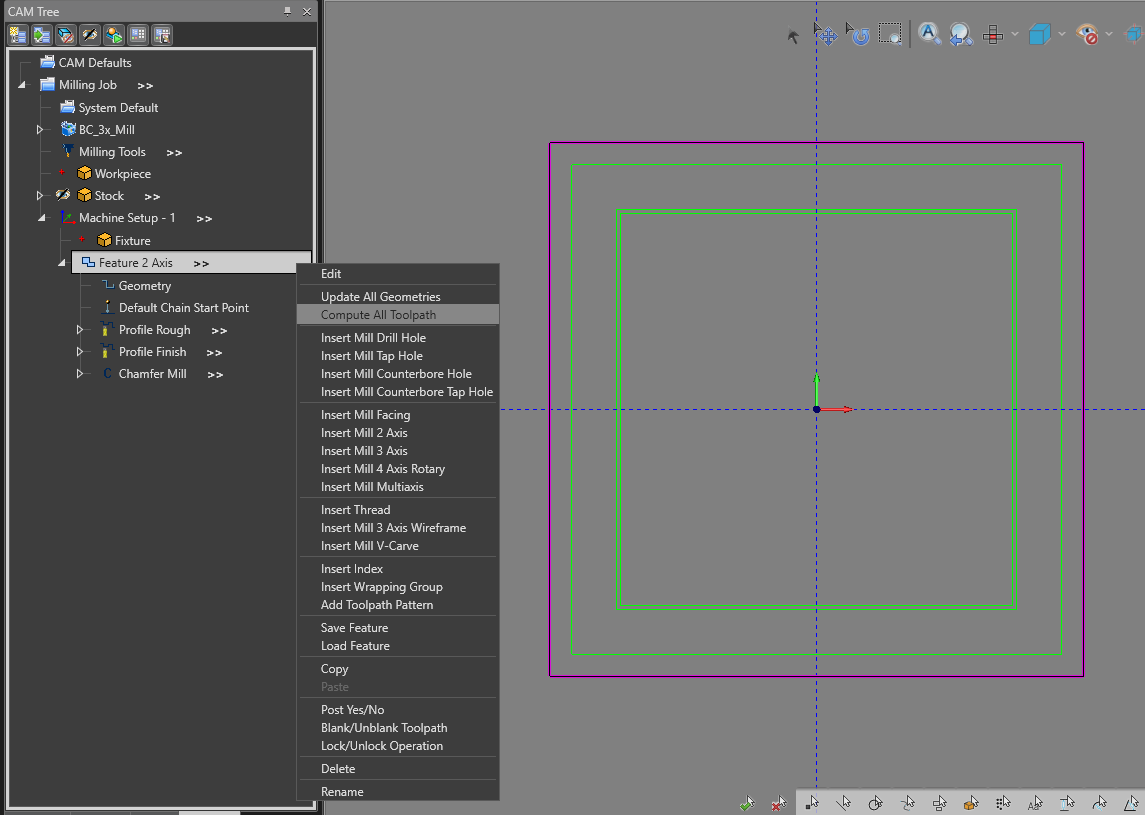
15.1. Right click on Feature 2 Axis and select Compute All Toolpath
Pic. 8 – Computed Toolpath With Left System Compensation and CW chain direction
Note: If you have multiple chains in a feature and only want to reverse one chain direction, right-click on "Geometry" and select "Re/Select" in the Feature (Instead of Default Chain Start Point). Click on the chain you want to reverse in the "Profile Chain" box. Then, hit the reverse icon to the right to reverse it. Click "OK" then re-compute the toolpath when done.
Option 2: Change System Compensation
If you still want to move in a counter-clockwise direction, but want to machine the outside of the rectangle, you will change the system compensation to the opposite side.
Pic. 9 – System Compensation (Right)
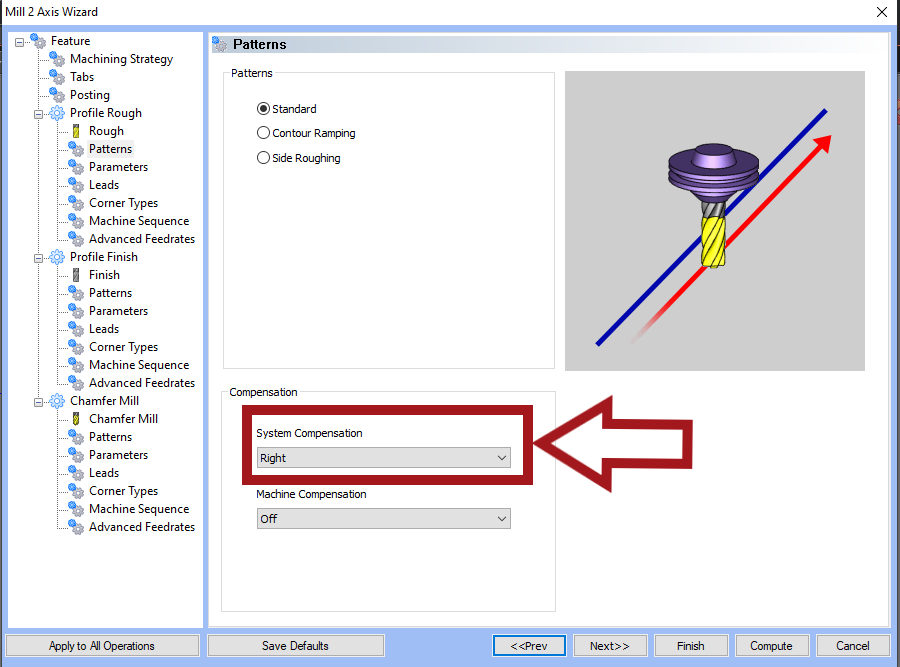
14.2. Right click on Feature 2 Axis and select Edit
15.2 Go to the Patterns page
16.2. Select Right for System Compensation then click Apply to All Operations to change the rest of the operations as well.
17.2. Hit the Compute button
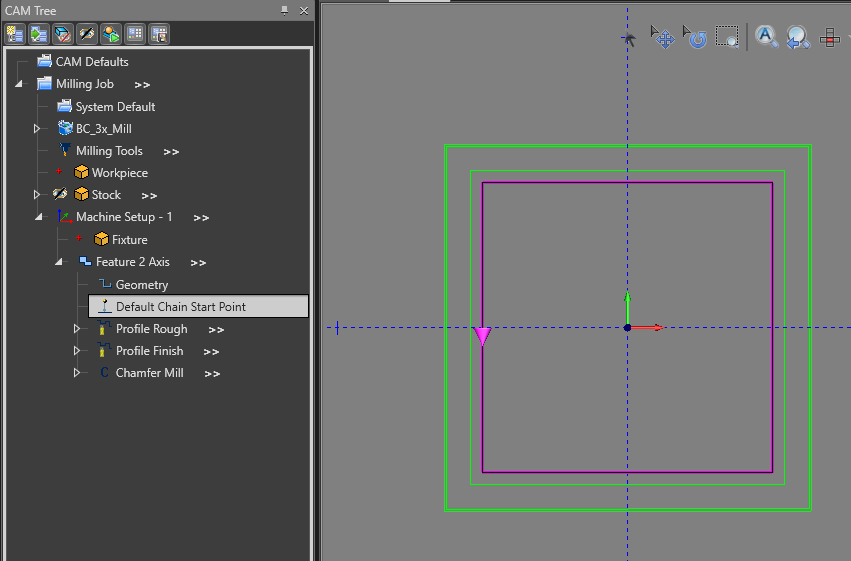
Pic. 10 - Computed Toolpath With Right System Compensation and CCW chain direction
If you need further assistance, please contact our support team at (727) 489 – 0003 or [email protected]