Knowledge Base Articles
- BobCAD-CAM V36
- Getting Setup
- Quick Tips & Tricks
- The BobCAD Basics
- Advanced Topics
- Computer Issues
- NC Editor
- Post Processor
- Our Forum
Link Your Graphics Card With BobCAD (NVIDIA)
Step-by-Step
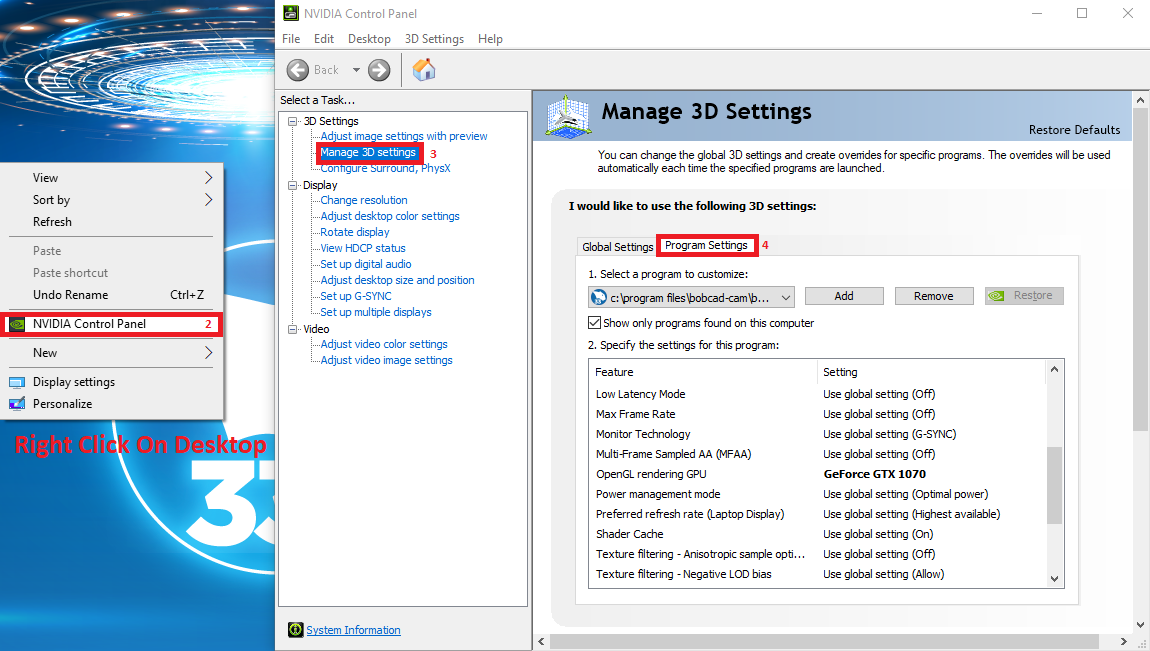
1. After closing out of the software right click on any empty space of the desktop of the computer.
2. Depending on the computer there will either be an AMD or NVIDIA Control Panel that will pop up in the list. (This tutorial will be based off of the NVIDIA Graphics card since it is a bit more popular).
3. After clicking on the NVIDIA Control Panel, the User will need to select the “Manage 3D Settings” on the Left.
4. Then, select the Program Settings tab.
Pic. 1 - Opening the NVIDIA Control Panel
5. Check to see if the software is already being used through the Graphics Card by selecting the drop-down box under 1. Select a Program to customize.
a. If the application is not in the drop down list then select the “Add” button.
Pic. 2 - List of Applications Running Through Card
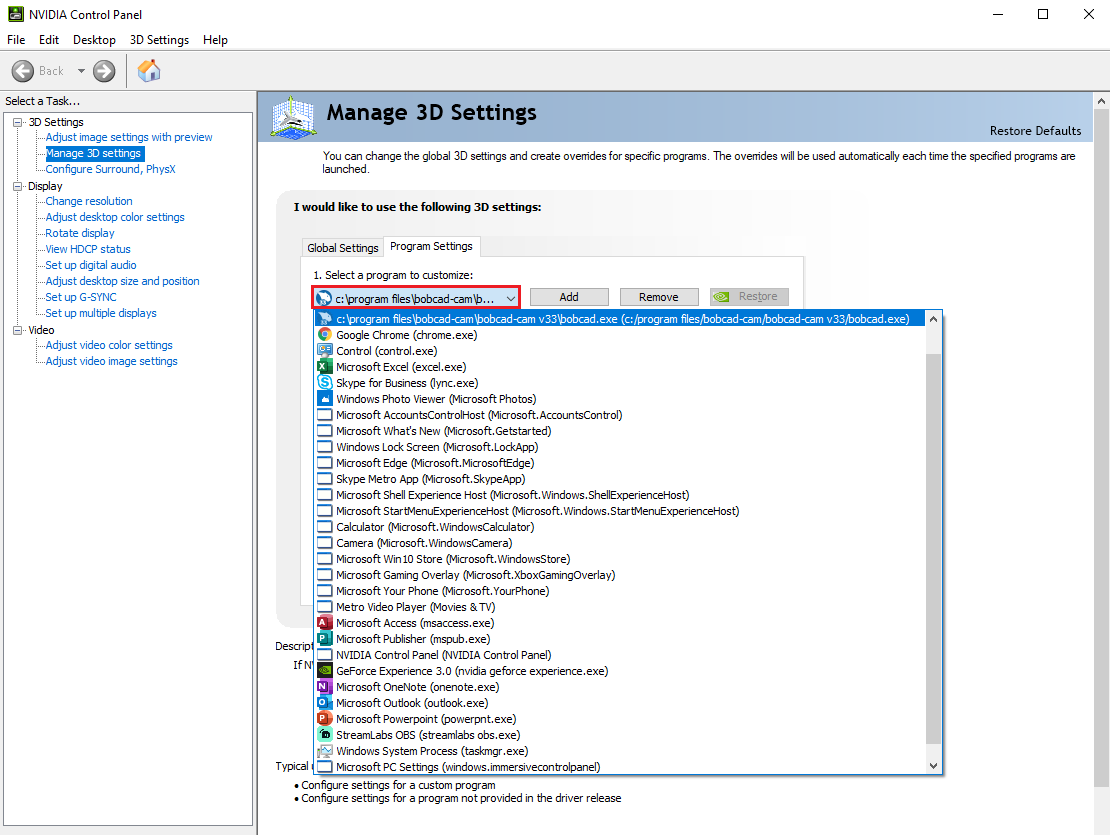
6. Select the version of BobCAD that needs to be added and click “Add Selected Program”.
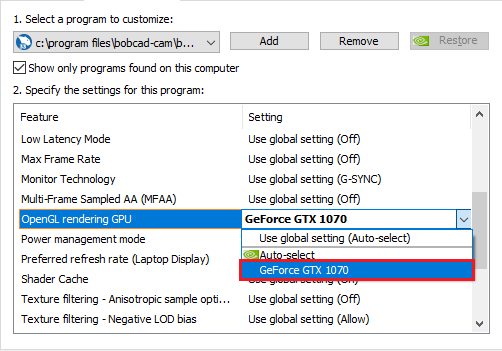
7. The final step is to go to the “Specify the Settings for this Program:” and call out the Graphics card for the OpenGL Rendering GPU Setting shown below.
8. After all of the steps below have been completed, hit Apply and reopen the software.
Pic. 3 - Calling Out the Graphics Card for OpenGL Functions
Note: Due to NVIDIA constantly making updates to the Control Panel the instructions may slightly differ from what is in the actual control panel for any specific card.
If you need further assistance, please contact our support team at (727) 489 – 0003 or [email protected]