Knowledge Base Articles
- BobCAD-CAM V36
- Getting Setup
- Quick Tips & Tricks
- The BobCAD Basics
- Advanced Topics
- Computer Issues
- NC Editor
- Post Processor
- Our Forum
Custom User Interface Set-up
(Customize User Profile, Profile Layout, Use Interface Options & Color Settings)
This document is a walk-through on how to customize the User Interface for BobCAD. It will show how to drag and drop side windows to customize the Profile Layout, how to blank / Unblank those windows, how to save your newly created Profile Layout and how to adjust color settings in the user interface.
Step-by-Step
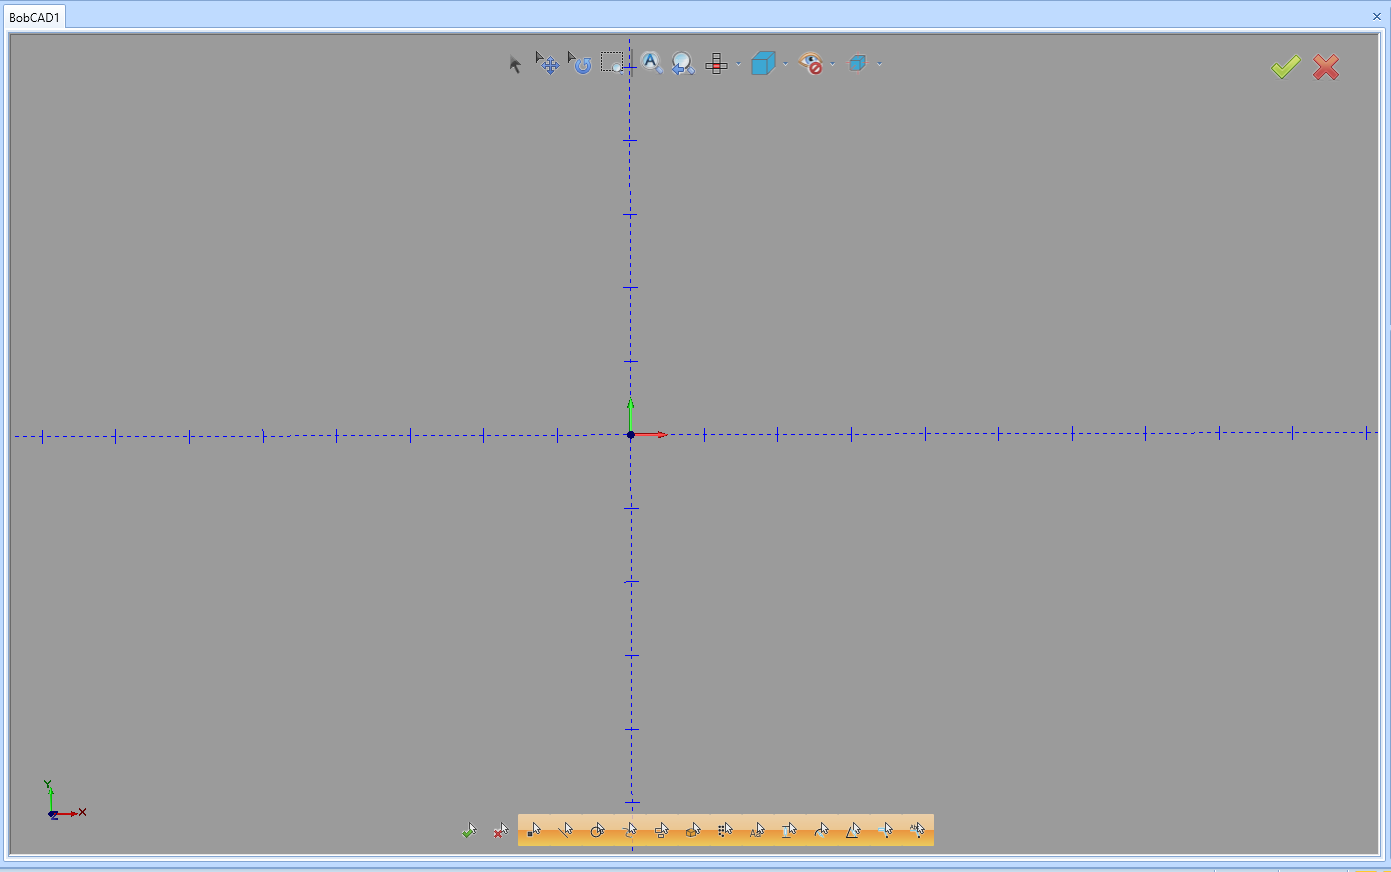
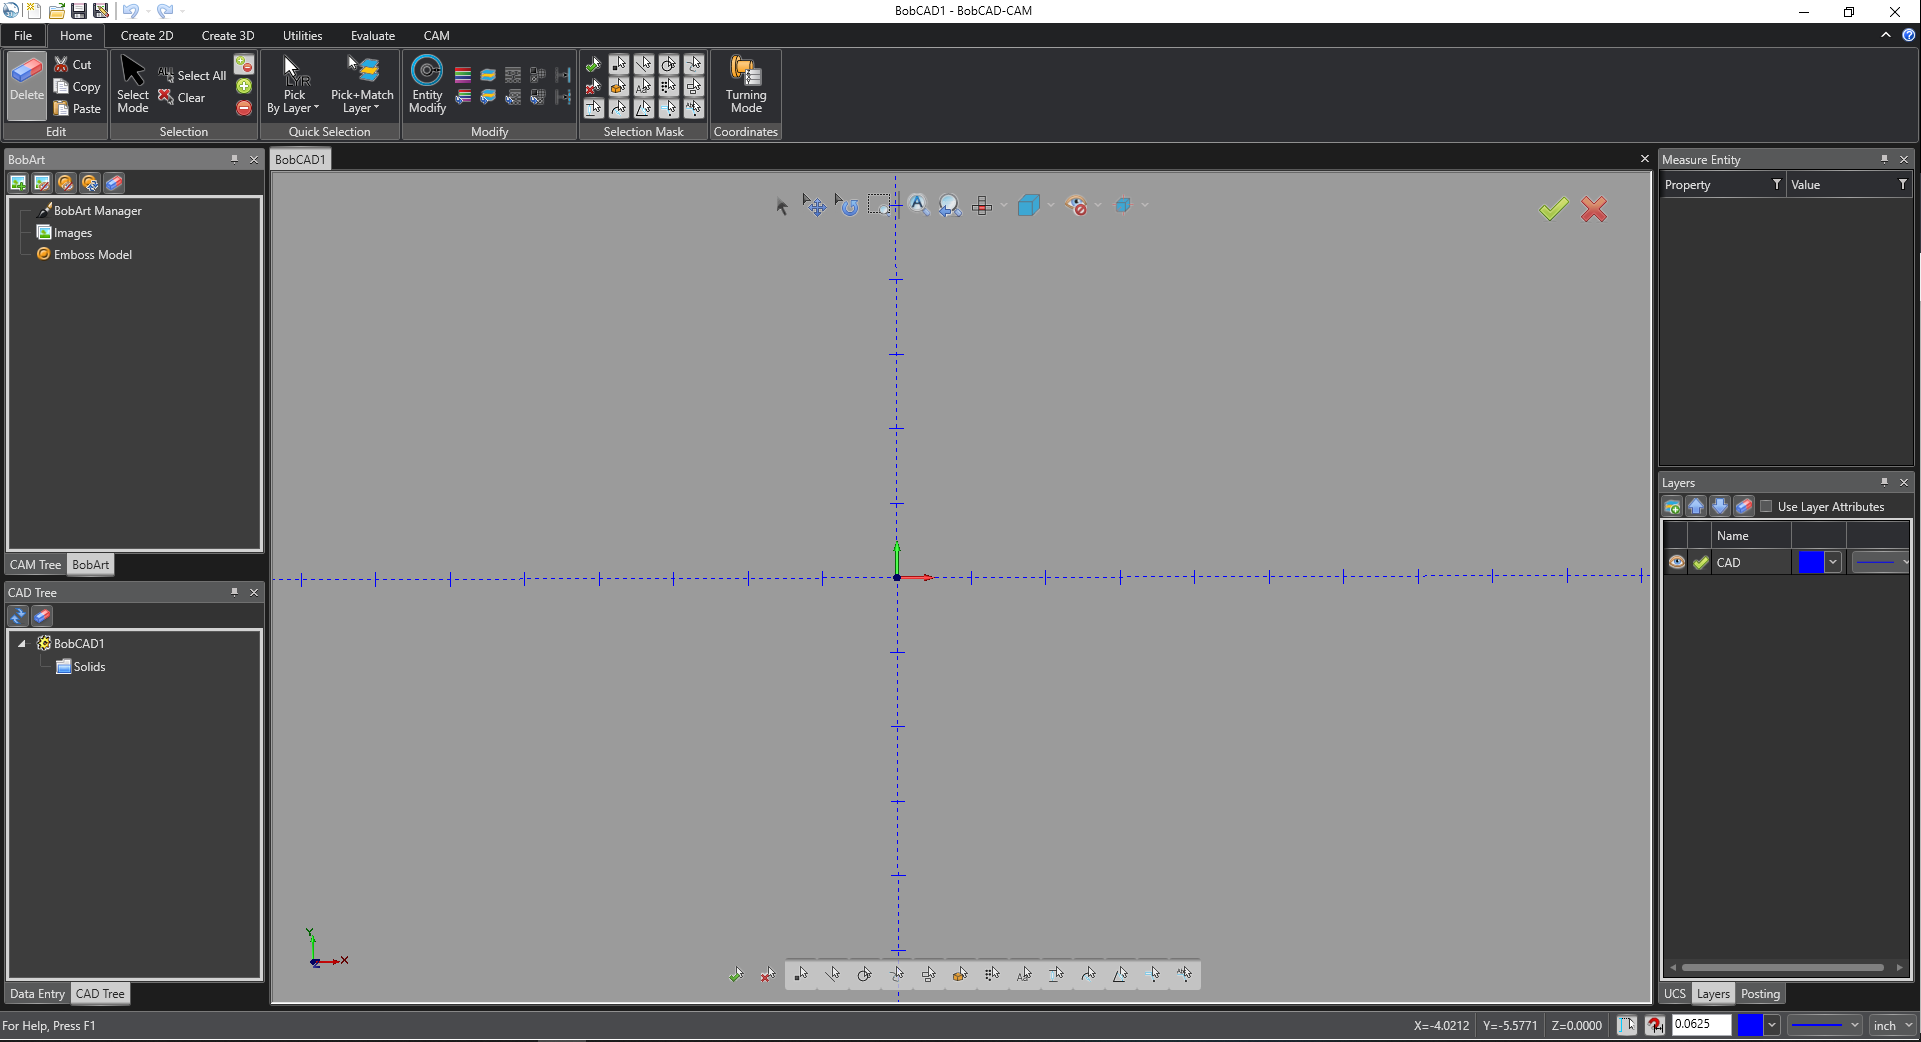
Pic. 1 – Initial User Interface 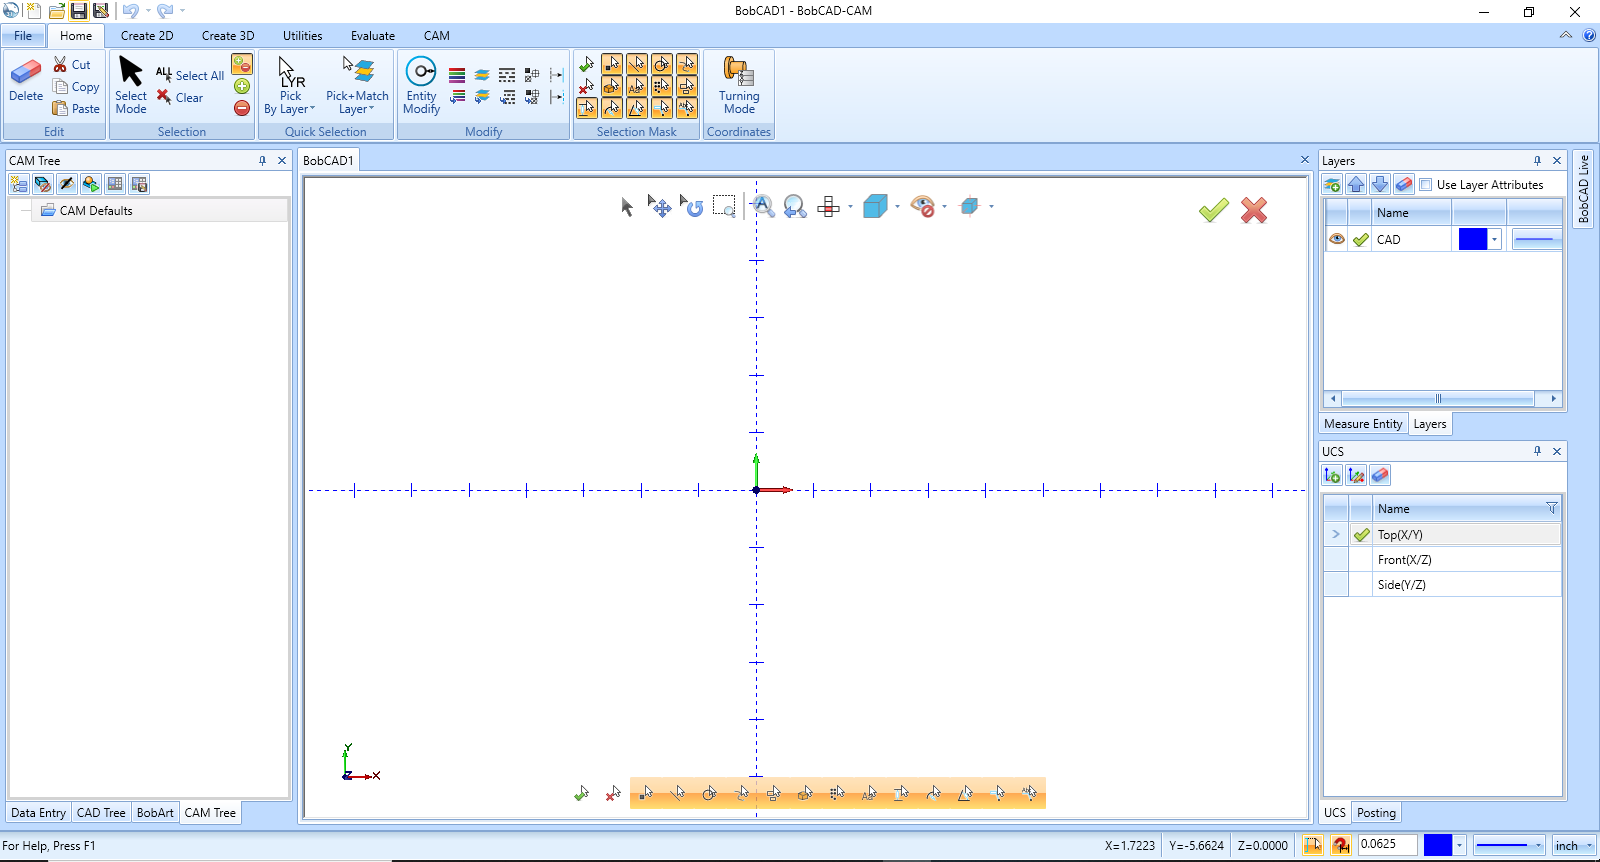 Data Entry, CAD Tree, BobArt & CAM Tree shown on left. Measure Entity, Layers, UCS & Posting shown on the right.
Pic. 1 shows the initial User Interface setup for this example. This is the Profile Layout named ”After Dark”.
Adjusting the Locations of the Windows
There are 10 different windows inside of BobCAD; Measure Entity, Tutorial Startup, Data Entry – Manager, CAD Tree – Manager, CAM Tree – Manager, Art – Manager, BobCAD Live, Layers Manager, UCS – Manager, Posting
You can adjust the location for these windows or even hide them if you do not want to show certain windows. The following steps below will walk through this.
Pic. 2 – Moving a window
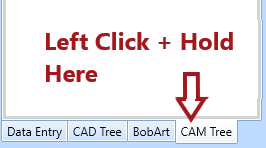
1. Left click and Hold on one of the windows that you would like to move
Alternatively, you can Left Click and Hold on the top bar of the window to grab all of the windows in that same section.
Pic. 3 – Placing window in different location
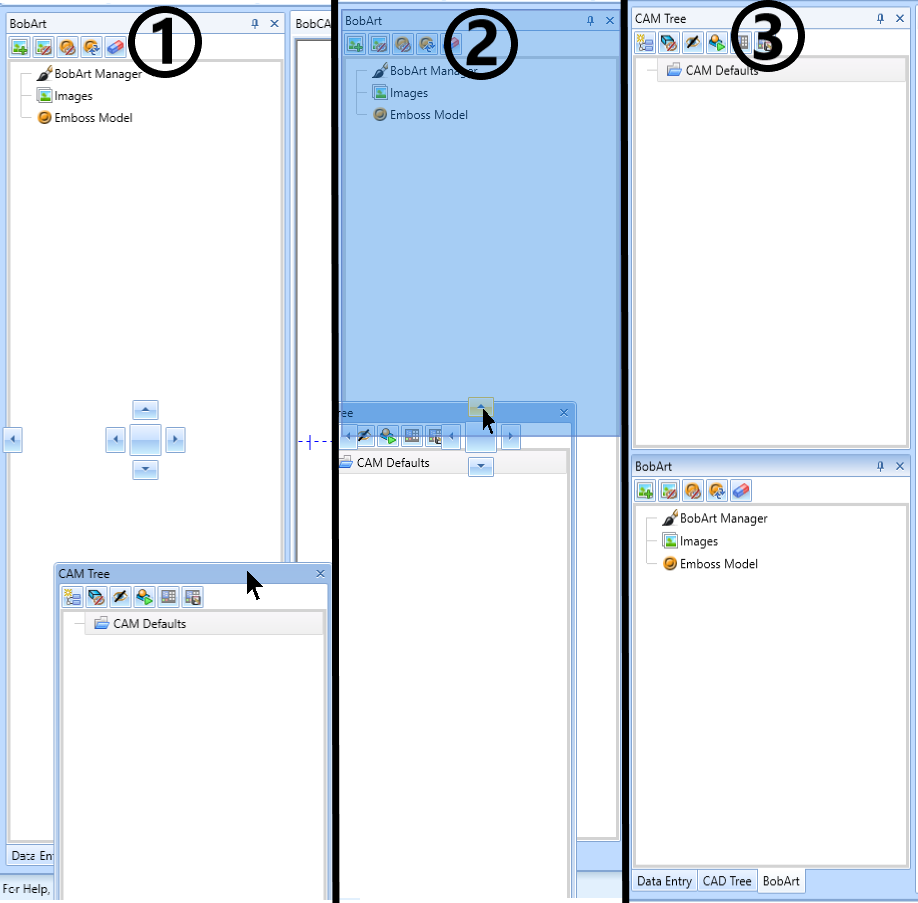
While holding the window, there will be arrows and a square that will appear to drop the window in a location (Image 1), based on where your cursor is located. If you hold the cursor over one of the arrows or square, it will show a preview (highlighted blue) of where it will place the window (Image 2).
2. Drag the cursor over one of the arrows or the square to see a preview of where the window will be placed.
3. Drop the window on an arrow or square to mount it into the software. (If you drop the window outside of one of these entities, the window will stay in the position of your cursor and will not be mounted into the user interface of BobCAD.)
You can mount the windows on either side of the Graphics Area that is located in the center of the software.
Pic. 4 – Placing another window into the upper left location
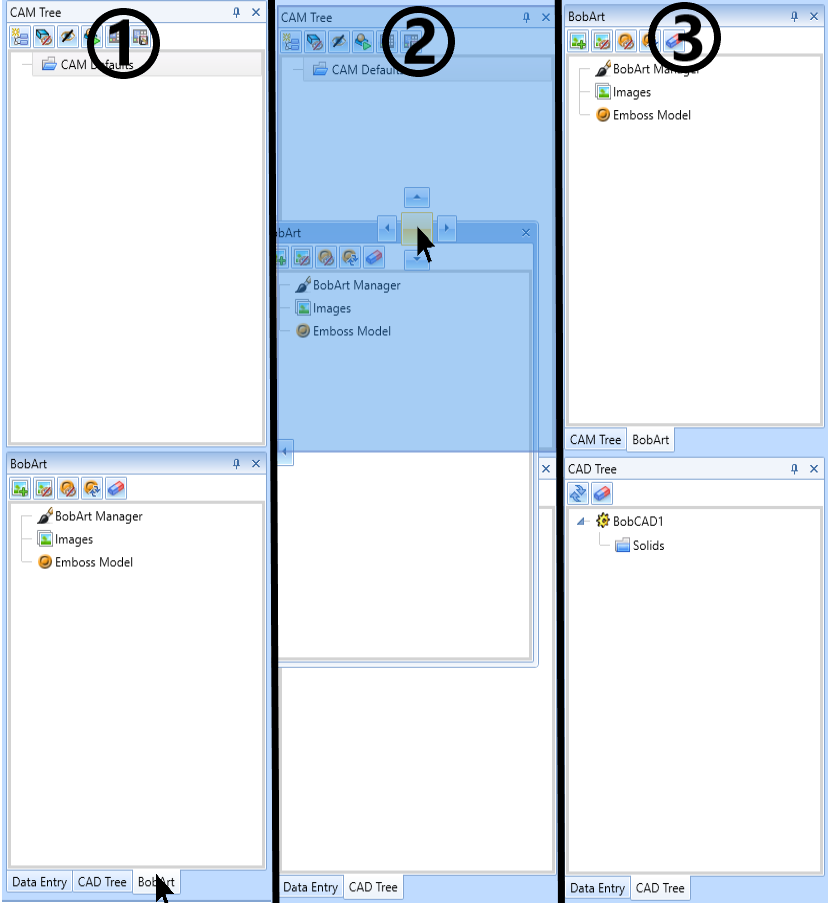
4. Grab another window and drag it to the upper left corner of the software until the arrows show up
5. Drop the window into the square icon to place a second window in the upper left section.
Notice how there are now two windows; CAM Tree & BobArt, in the upper left location and two windows; Data Entry & CAD Tree, in the lower left location.
Pic. 5 – Hide/Unhide Windows
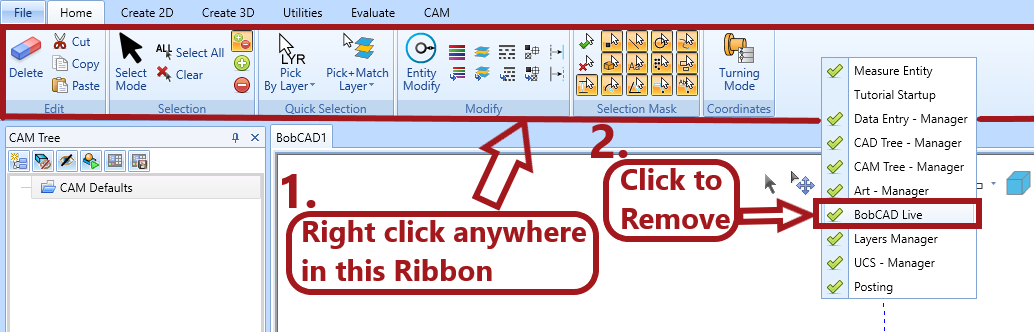
6. Right click anywhere in the top ribbon of the software to pull up the list of all windows.
If you want to hide or show a window, you can do this toggling on and off the checkmarks shown.
7. For this example, click on “BobCAD Live” to hide it
Pic. 6 – Saving the Current Customized Layout (Picture from V33)
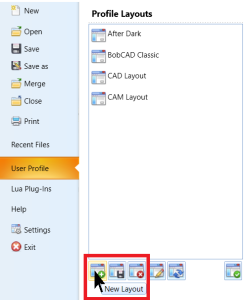
8. To save the change made, Go to File --> User Profile
9. Click the ![]() (New Layout) icon to create the layout for the current changes
(New Layout) icon to create the layout for the current changes
Pic. 7 – Reset layout
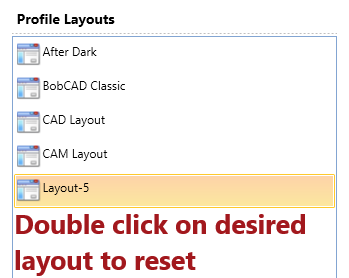
If you ever want to reset your layout. Just double click on the desired Layout to reload it. DO NOT hit the apply button to reset the layout which is used only for the User Interface Options below.
Pic. 8 – Changing the Background Color of Graphics Area
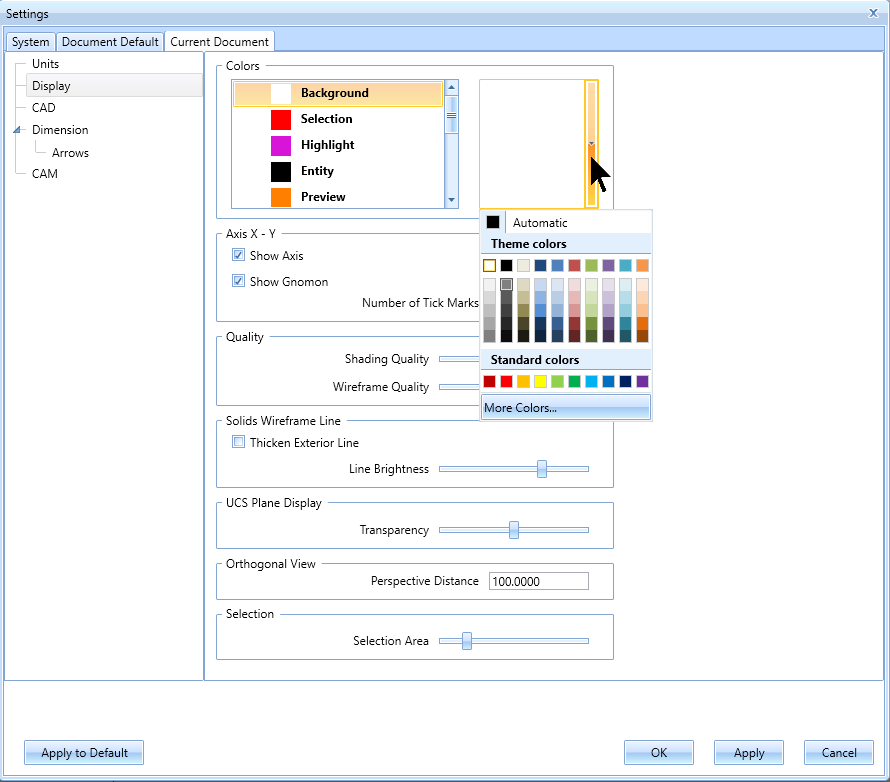
10. Go to File --> Settings
11. Click on the “Current Document” tab
12. On the Display tab, select Background and click the on the side drop-down arrow to show the color list
13. Select a Background Color that you would like to make your Graphics Area
While you are on this page, you can also adjust other colors as well such as the Selection, Highlight, Entity, Preview, Solids, Dimension/Text, Axis, UCS Plane and Toolpath colors.
Pic. 9 – Apply the Settings Change
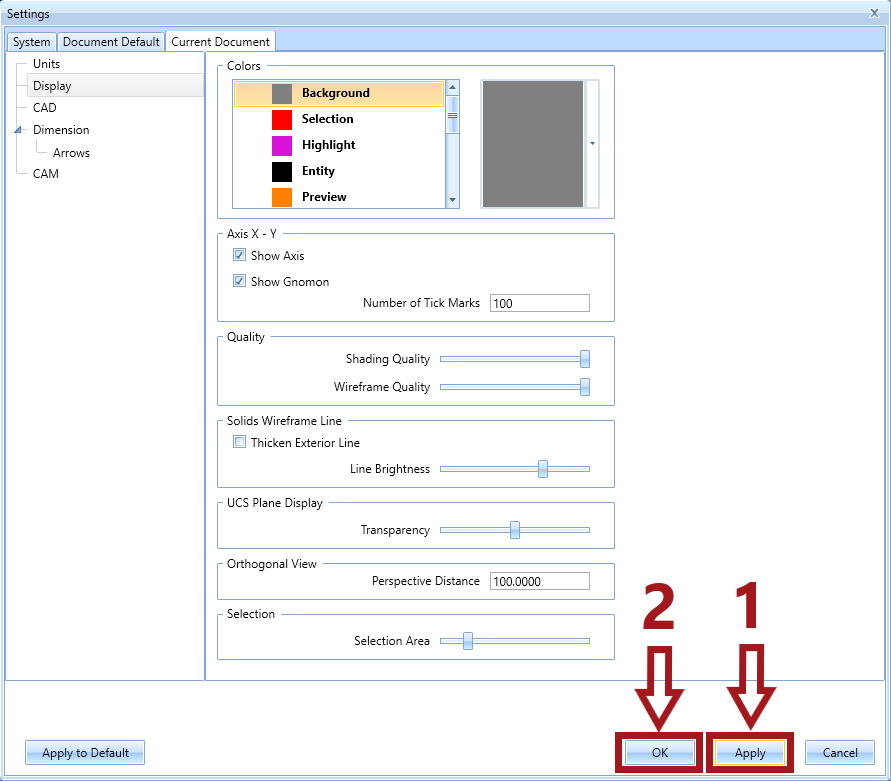
14. Select Apply then OK
15. To change these settings to your default settings for a new file, go to File --> Settings --> Document Default and repeat steps 11-14
Pic. 10 – Background Color Change for Graphics Area
Pic. 10 shows the settings change applied for the background color in the Graphics Area.
for V34 and newer: 16.1 & 17.1
for V31 - V33: 16.2 & 17.2
Pic. 11.1 – User Interface Options Theme V34 and newer
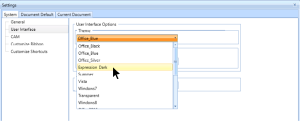
16.1 Go to File --> Settings
17.1 On the System tab in the User Interface section, click the drop-down box for Theme and select a different theme. (The theme selected for this example is Expression_Dark)
Pic. 11.2 – User Interface Options Theme V31-V33
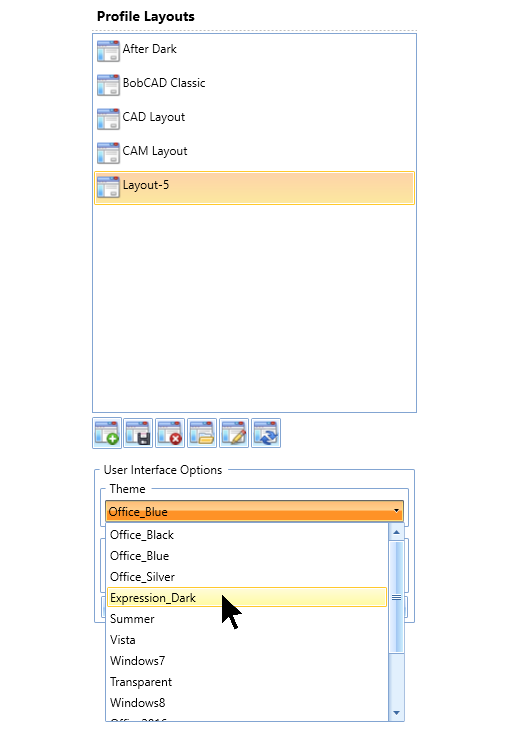
16.2 Go to File --> User Profile
17.2 In the User Interface Options section, click the drop-down box for Theme and select a different theme. (The theme selected for this example is Expression_Dark)
18 Hit Apply
Pic. 12 – The Complete Customized User Interface Setup
Pic. 12, shows the completed User Interface after all changes have been made.
If you need further assistance, please contact our support team at (727) 489 – 0003 or [email protected]