Knowledge Base Articles
- BobCAD-CAM V36
- Getting Setup
- Quick Tips & Tricks
- The BobCAD Basics
- Advanced Topics
- Computer Issues
- NC Editor
- Post Processor
- Our Forum
Stock Orientation, Aligning Stock with Model (Assembly Part)
If you have a model that does not align with the default UCS when loading in the part, you may need to align your stock with respect to the model on the Stock Definition page. A possible reason for this is that the part originally came from an assembly.
It is a common misconception to try to translate and rotate the part to align with this default USC. You will not have to do this. Instead, you can align the stock using “Stock Orientation” on the Stock Definition page when setting up a job.
Note: There is now a newer way to accomplish this task starting in V33. You can now use the "Align" feature located in the "Utilities" tab to easily move and align the model back to the global UCS. This means that you would not have to align the stock like you see in this article.
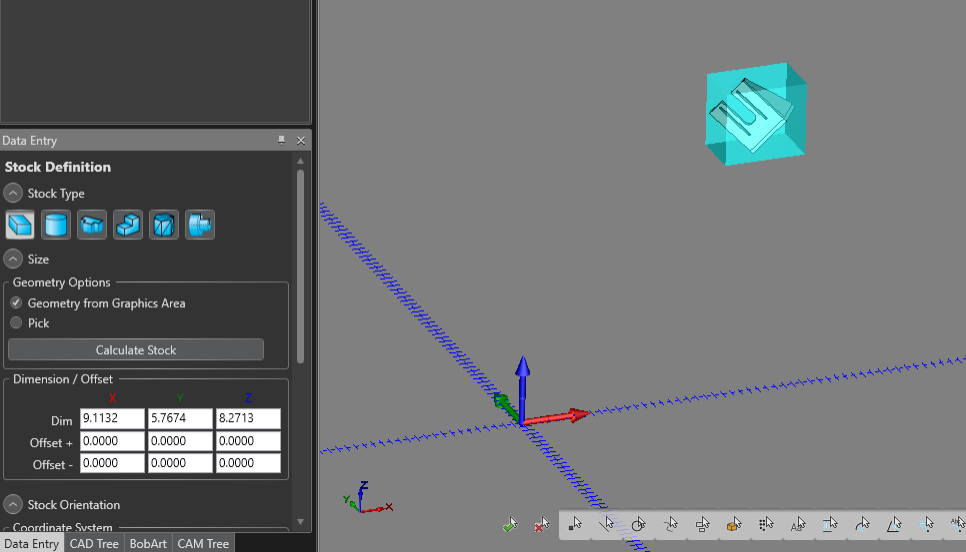
If you look at the part and stock in the picture above, this is similar to what you might see when the stock is initially created. You can see the stock is currently not aligned with the model. Below are some steps you should take to adjust the stock orientation.
1. Start a new job, go to the Stock Wizard and click inside the box under where it says “Origin” to activate your origin point and select a point that you want to reference.
Generally, a good point to select is the corner of my model so that you can use the edges of the model as a reference point in the next couple of steps.
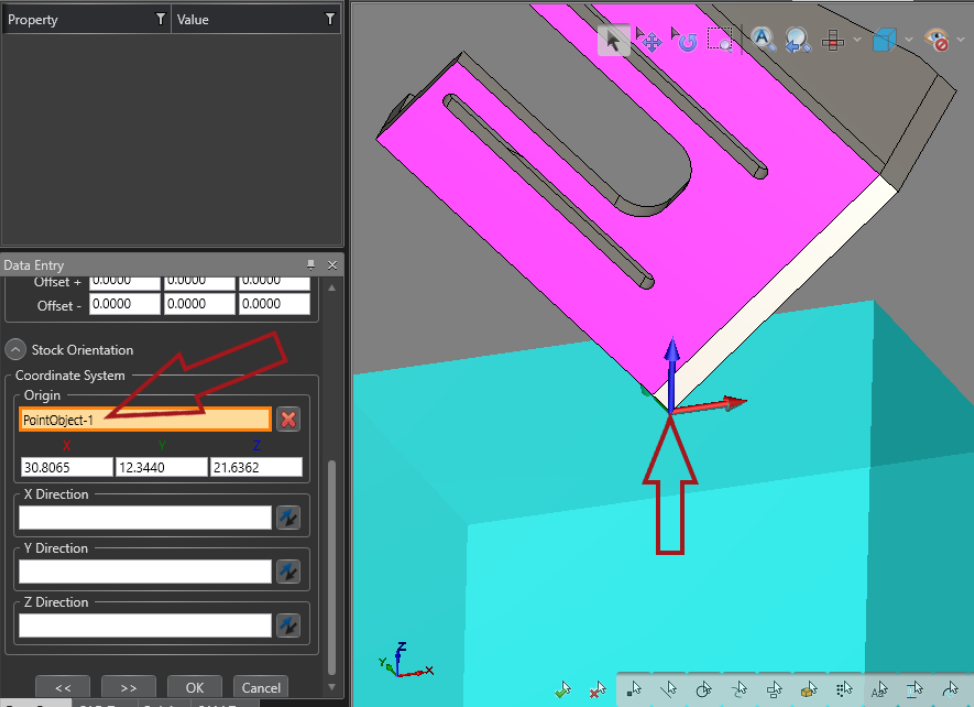
A couple things you should note when doing this. One, you can notice how the stock gets moved with the origin point you select. Do not worry about this. Wait until you have completed all the steps and then you will re-calculate the stock. Two, the values shown under “Origin” refer to the CAD UCS inside of BobCAD and have nothing to do with your machine origin. These numbers are used simply to align the stock.
2. Now, you will use X,Y,Z Direction to adjust the coordinate system and align your stock. In this example, you can click inside the “X Direction” box to activate to X direction. Then, simply select an edge along the model as a reference to align the X axis.
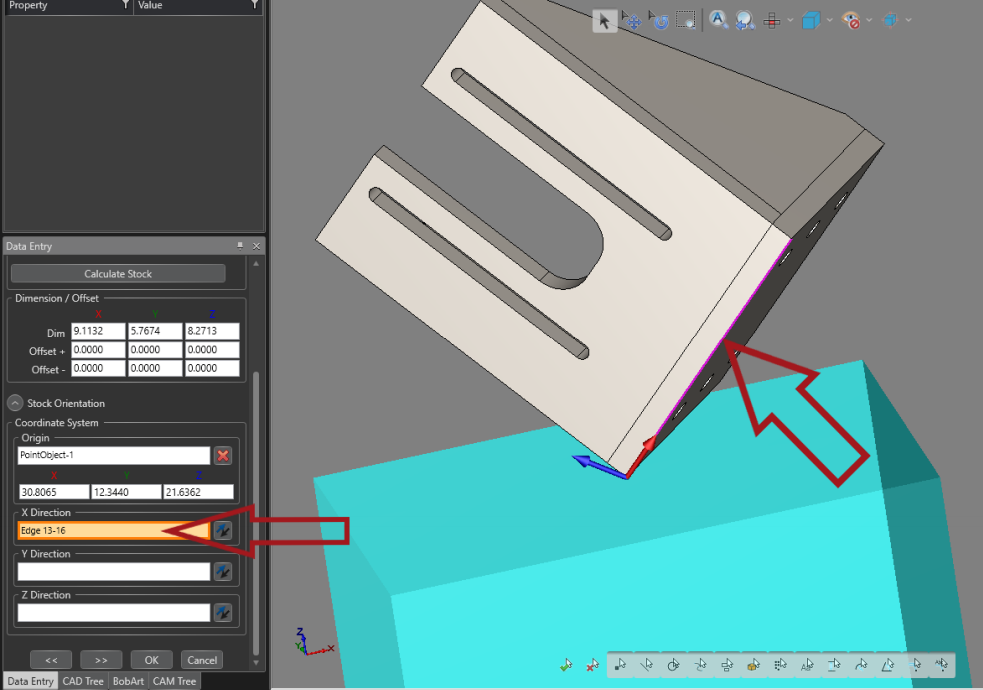
You will notice in the picture above, that the X axis will snap down the edge you selected.
3. Then, repeat the previous for the Y or Z direction, if everything is properly selected then all three axis will be fully defined after selecting the direction of two of the axis.
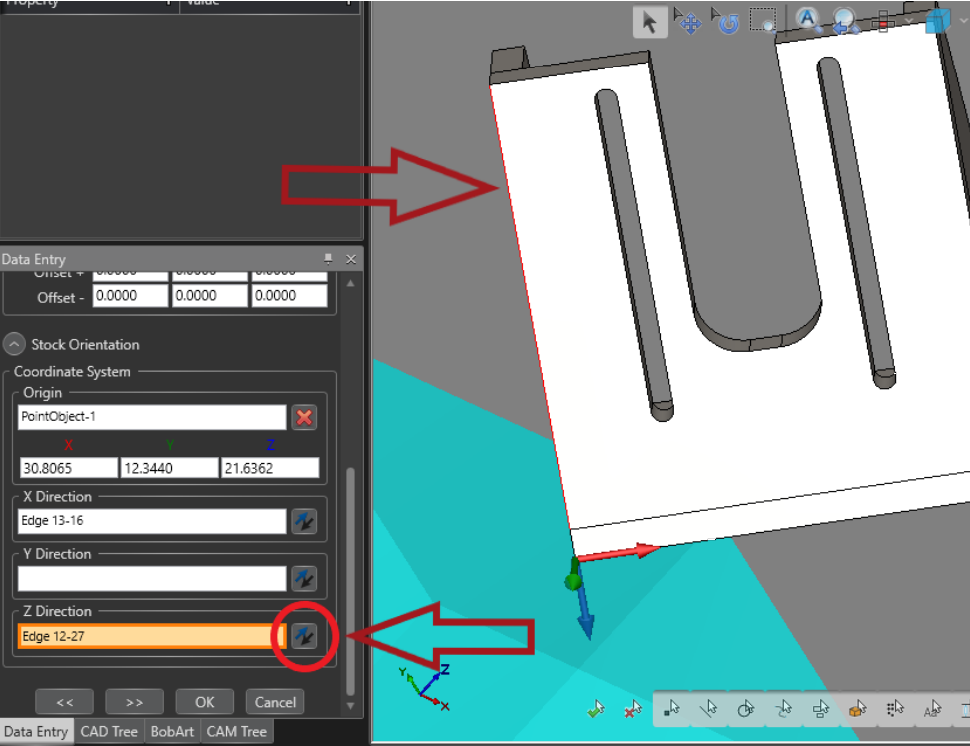
Sometimes, you will notice that the axis will go down the opposite direction that you intended. You will simply click the reverse button located to the right of the axis you want to reverse. Then, you will notice that the axis will flip.
4. The final step is to click the “Calculate Stock” button towards the top of the Stock Definition page.
This will align the stock with respect to model and will generate a stock using the maximum and minimum X,Y,Z values of the part.

Your stock is now aligned with your model. You can now hit the next arrow button and setup machine origin with respect to this new stock/model and start creating features aligned with the part.
If you need further assistance, please contact our support team at (727) 489 – 0003 or [email protected]