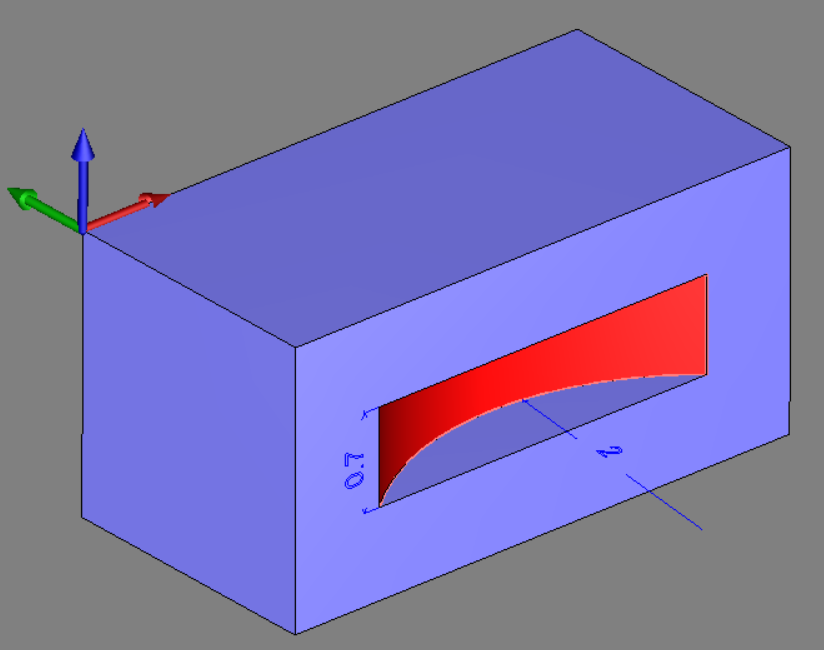
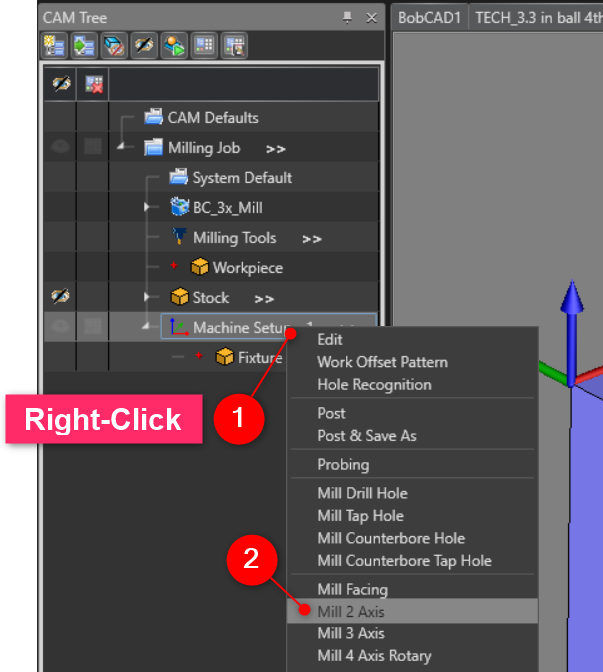
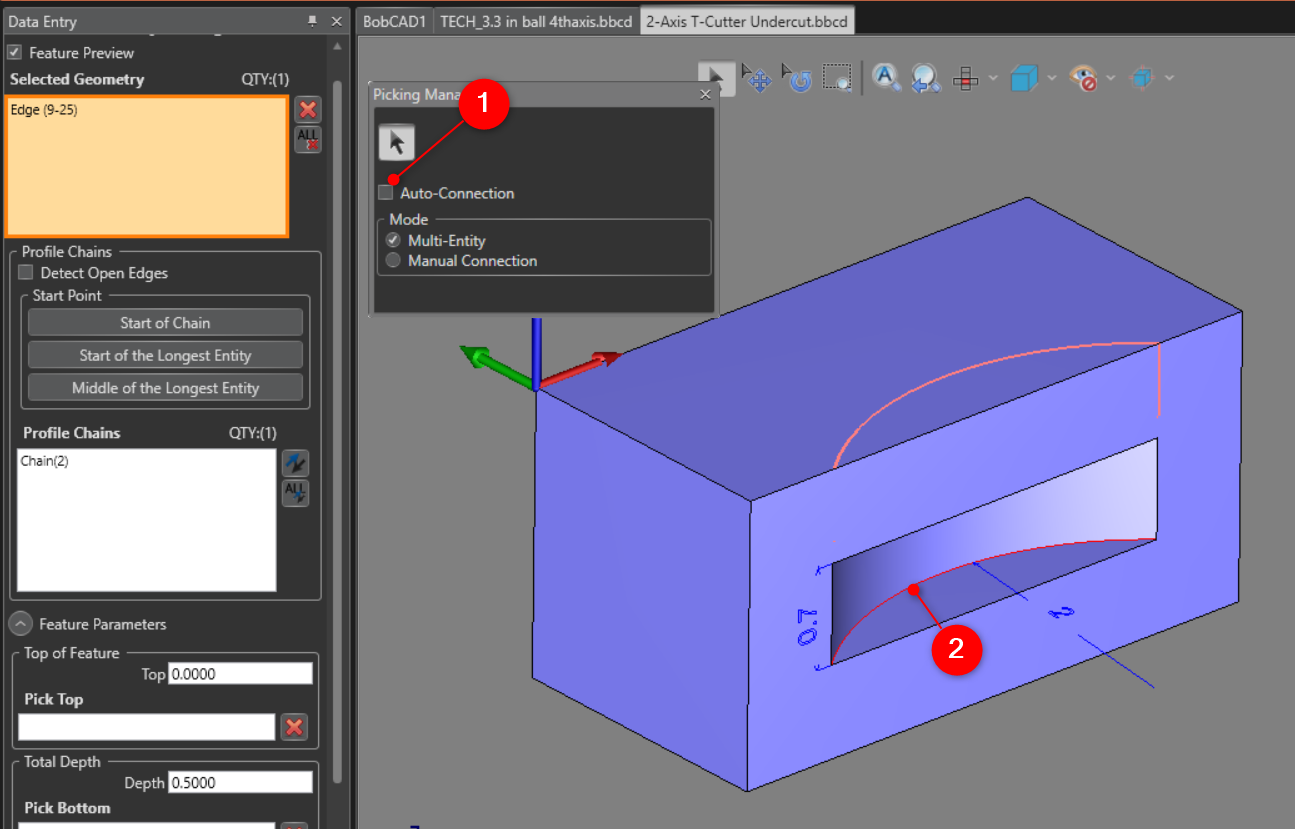
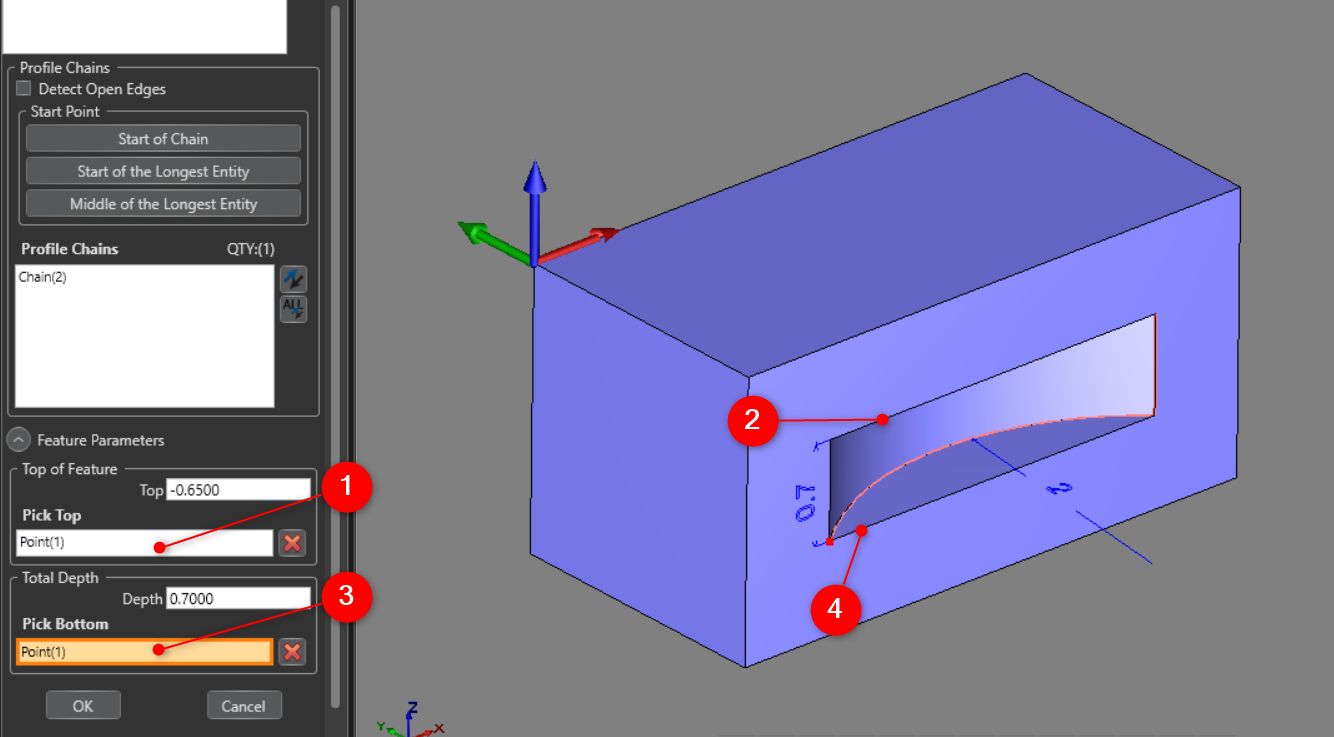
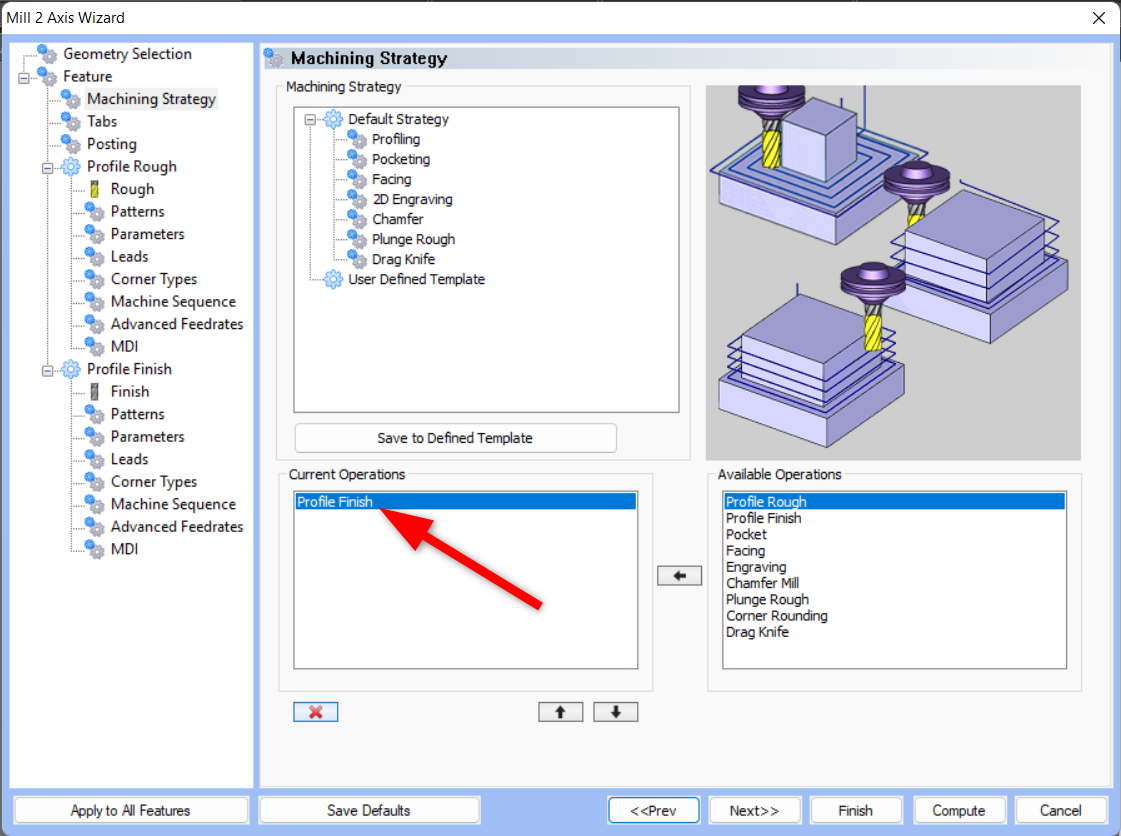
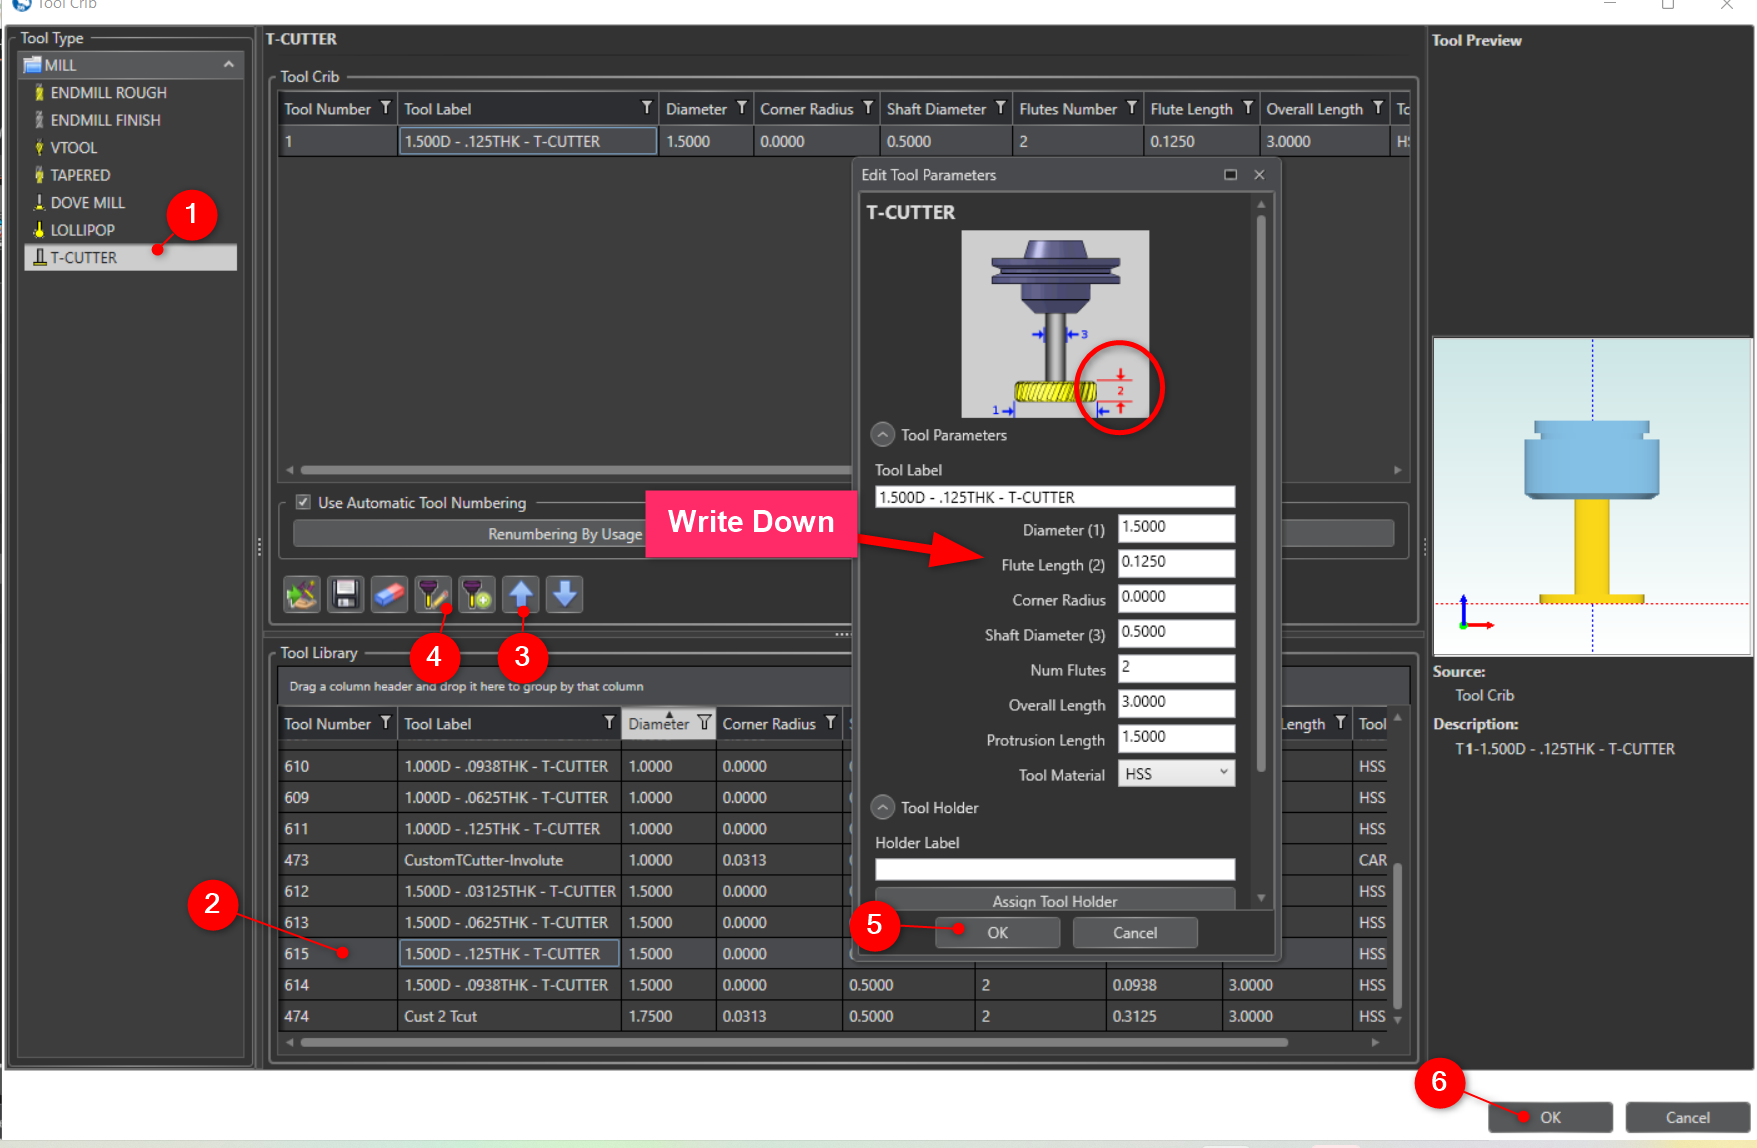
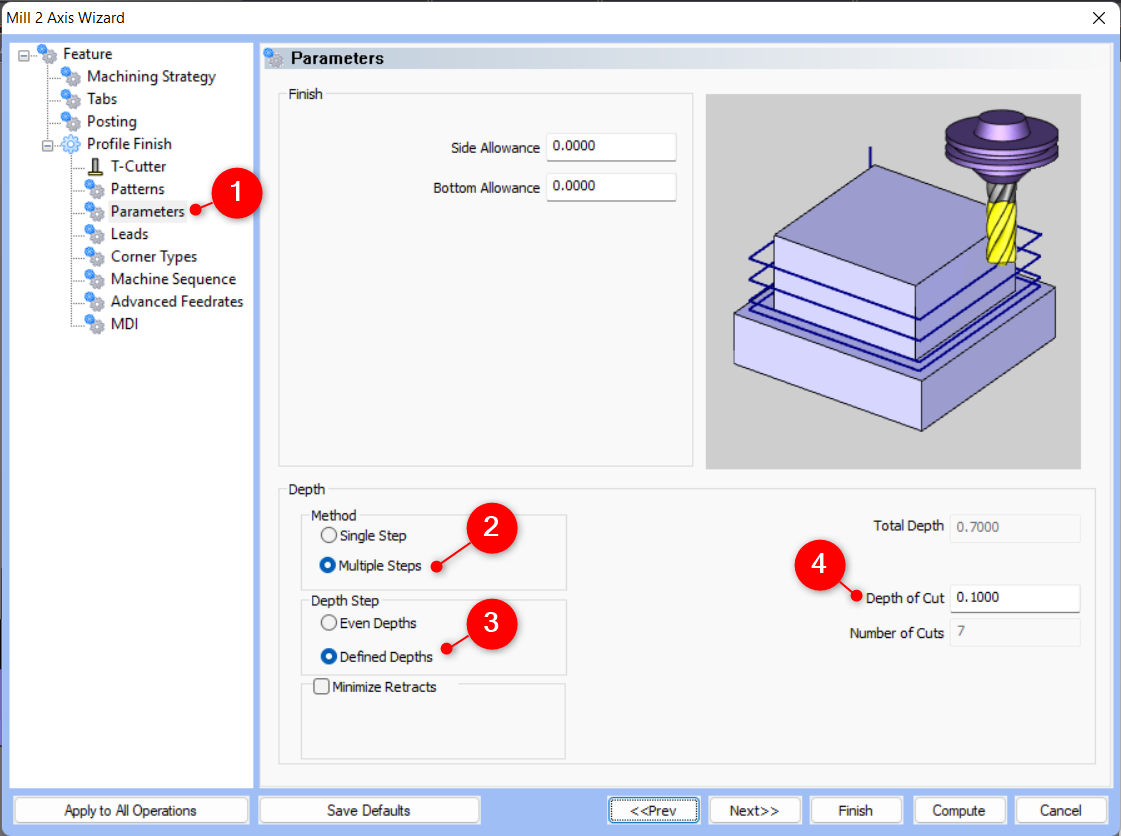
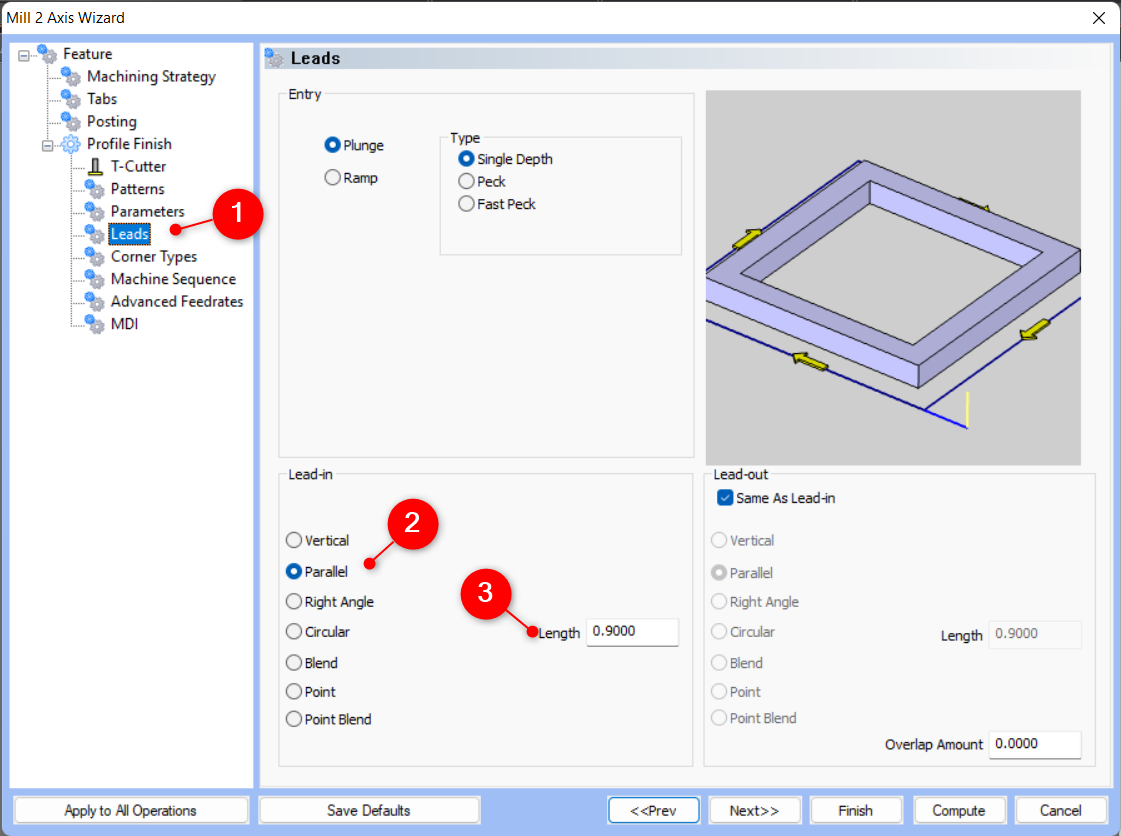
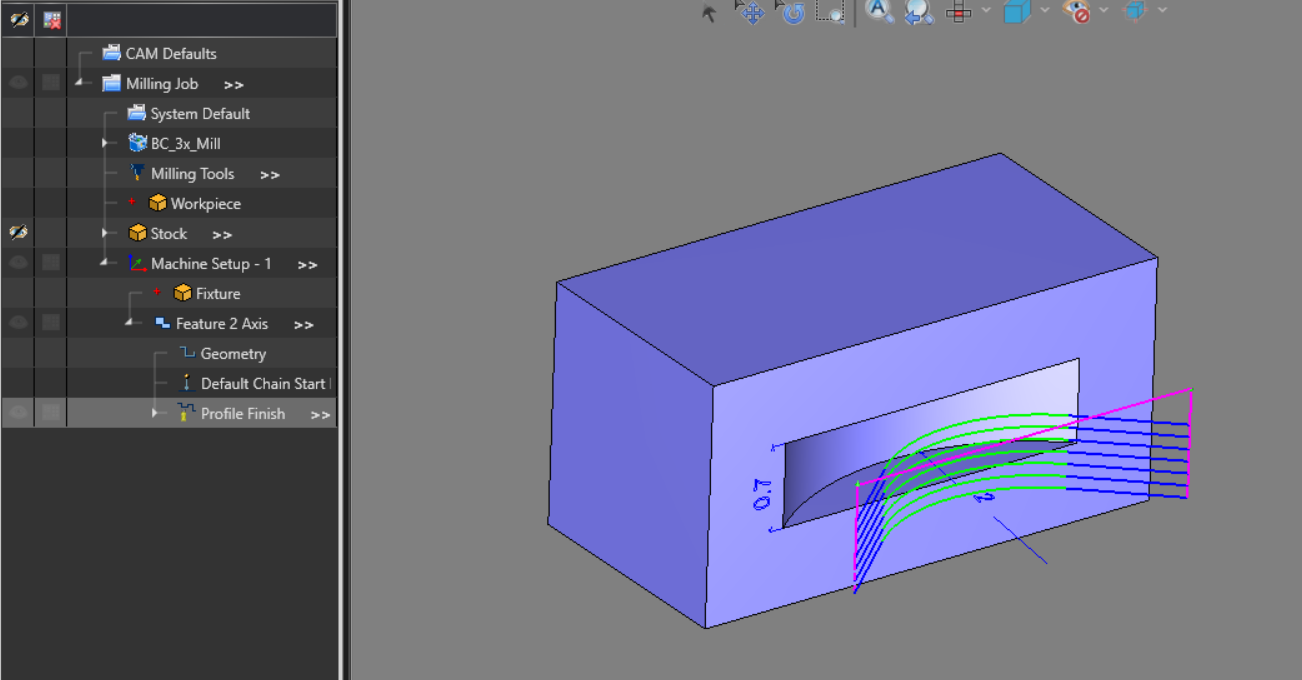
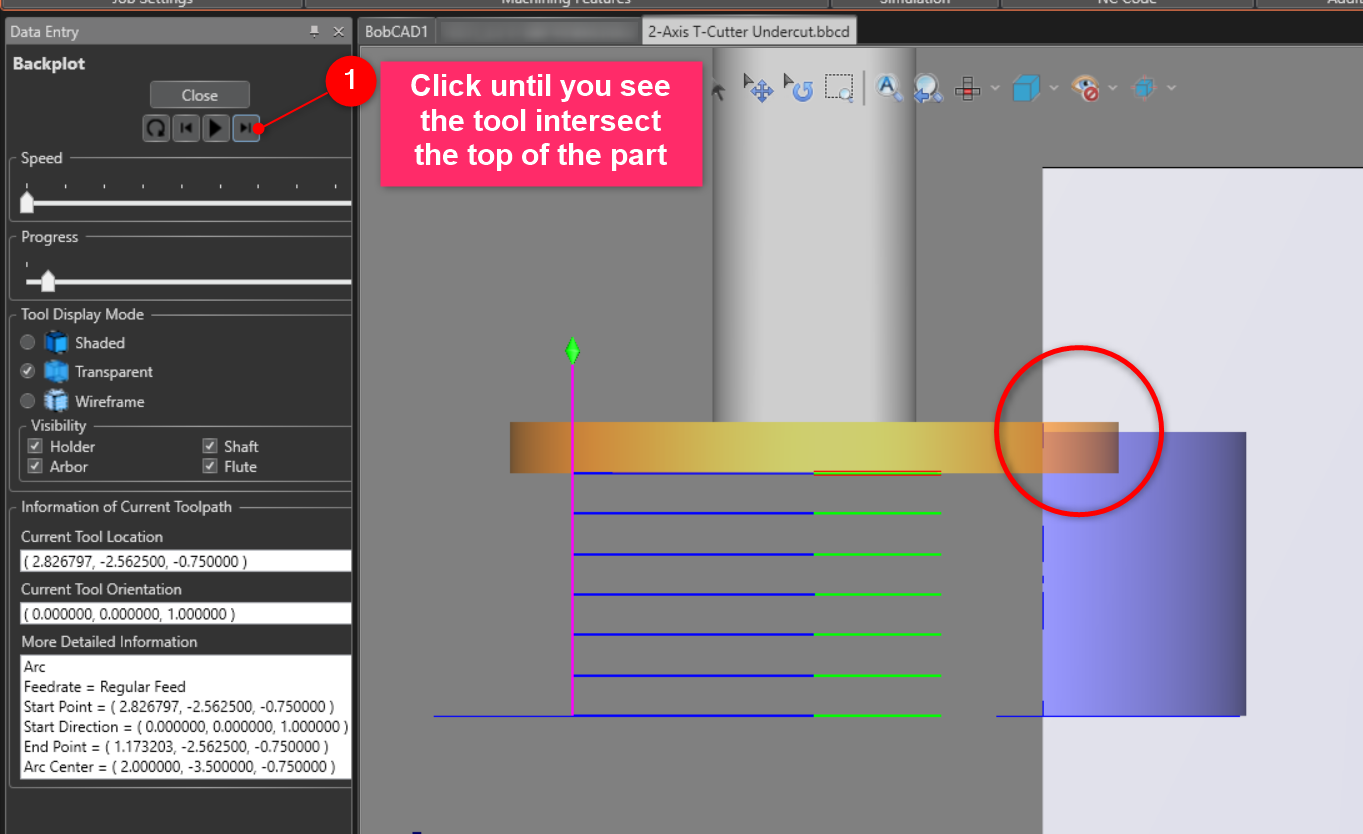
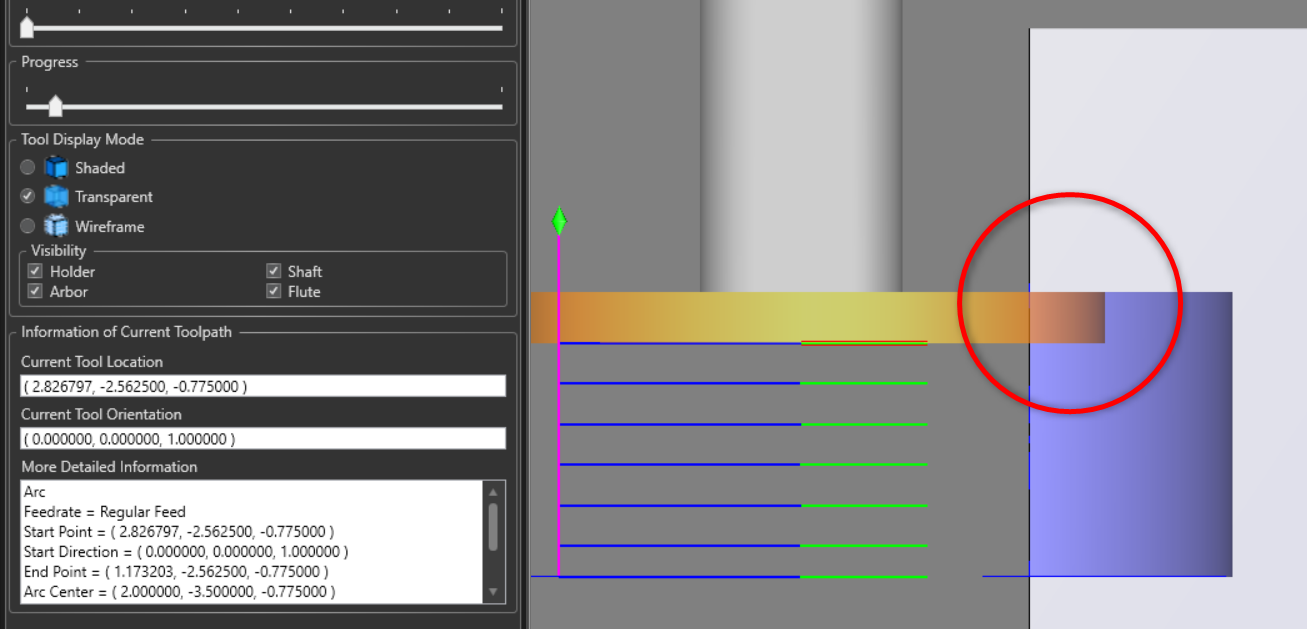
This article demonstrates the process of generating an undercut toolpath with a T-Cutter and the 2x Profile Feature that need multiple depth cuts. When designing a slot that exceeds the T-Cutter's thickness, precise calculations are essential to ensure that the depth cuts align appropriately within the slot. Download the part and follow along! 2-Axis T-Cutter Undercut.bbcd Pic. 1 - Example Undercut Part In the part above, the red is the surface that we are trying to create. The slot is 0.7 inches wide and the profile of the surface is a 2 inch radius arc. This part can be programmed using a Mill 2-Axis feature. We will use a Profile Finish Operation inside the Mill 2-Axis feature to control the path of the tool. However, this case is a little unique. That is because we need to set up the Depth Cuts and Top of Feature so that the toolpath will stay contained inside the slot. 1. Right-click on the "Machine Setup" in the CAM Tree and select "Mill 2 Axis" 2. Click "Select Geometry" and select the bottom edge on the inside of the undercut Note: You only need to select edges of the surfaces or 2D wireframe geometry. Do not select the surfaces themselves. Note: In this example, make sure you disable “Auto-Connection” in the Picking Manager so that you can only select the inner bottom arc. For more info about how the Picking Manager works, refer to this document: Picking Manager – How it Works 3. Click the "Pick Top" box and select the top portion of the undercut (See pic below) 4. Click the "Pick Bottom" box, select the bottom portion of the undercut and hit "OK" 5. Navigate to the "Machining Strategy" tab and set up the “Current Operations” box so that it only has a Profile Finish Note: You can add a Profile Rough here if you need one as well. 6. Navigate to the Tool page and select the “Tool Crib” button to add your T-Cutter. Make note of what your “Flute Length (2)” Dimension is as we will use this value later. In this example, we will use a 1.5 inch diameter, 0.125 Thickness T-Cutter (Flute Length (2) = 0.125 inches). 7. Navigate to the “Parameters” page and select, “Multiple Steps” 8. Select the "Defined Depths" and set the Depth of Cut value to the desired depth for each pass. Write the Depth of Cut value down as well. In this example, we will use a Depth of Cut = 0.1 Inches 9. Navigate to the “Leads” page, select “Parallel” in the Lead-in section and set a Length value so that the initial toolpath start outside of the part. In this case, we set this value to 0.9 Inches 10. We will leave the other pages default for now and hit the “Compute” button Pic. 2 – Initial Toolpath Calculation At this point, this toolpath appears to look good. In most cases, this would be all you need to do to setup a 2-Axis. However, there is one problem here. Let’s evaluate the toolpath and see what might be wrong. To do this right-click on “Profile Finish” in the CAM Tree and select, “Backplot”. Use CTRL+ 1,2,3…etc (CTRL+5 in this example) to position the view to see the side of the part. Click the Forward arrow until you see the tool intersect the top of the part. As you can observe in the picture above, the tool is gouging into the top of the slot. This is because of the way the Profile Finish Operation calculates the toolpath. The Profiling Toolpaths will simply follow the exact path you give it when selecting the edge of the part. To create the Depth Cuts, it simply starts from the bottom of the Feature and evenly spaces out the toolpath upward by the depth of cut value you set (0.1 in this example). When the toolpath gets to the top of the feature, it will add an additional pass to fully cut the wall. It does not take into account the thickness of the T-Cutter. What makes our case unique is that we actually care about where the tool starts since this is a side slot. We need the toolpath to fit perfectly at the top and bottom. So, what we need to do in the next section is adjust the “Top of Feature” so that we can take into account the Thickness of the T-Cutter. 1. Go to the CAM Tree and double-click on “Geometry” under Feature 2 Axis !!IMPORTANT STEP!! 2. To account for the Thickness of the T-Cutter and the custom Depth of Cut we set, enter the following value for the Top of Feature: Top of Slot: Can be found when you “Pick Top” and select the top of the Slot Depth of Cut: Is set up on the “Parameters” page in the feature Flute Length (2): Is the Thickness of the T-Cutter In this example: 3. Click “Pick Bottom” and reset the Total Depth so that it stays at the bottom of the slot. Click, “OK” 4. Right-Click on “Feature 2 Axis“ and hit, “Compute All Toolpath” You can now open another Backplot and view the intersection between the Tool and the Top of the Slot. Observe that we now get the top of the T-Cutter touching the exact top of the side slot.
If you need further assistance, please contact our support team at (727) 489 – 0003 or [email protected]Knowledge Base Articles
Mill 2-Axis T-Cutter Undercut Example
Step-by-Step
Setup the Multiple Depth Cuts:
Evaluate the Initial Toolpath Calculation:
Configuring the Mill 2-Axis Profile Finish for a T-Cutter Slot:


![]()

BobCAD-CAM V36
Getting Setup
Quick Tips & Tricks
The BobCAD Basics
Advanced Topics
Computer Issues
NC Editor
Post Processor
Our Forum
Created: August 26, 2021